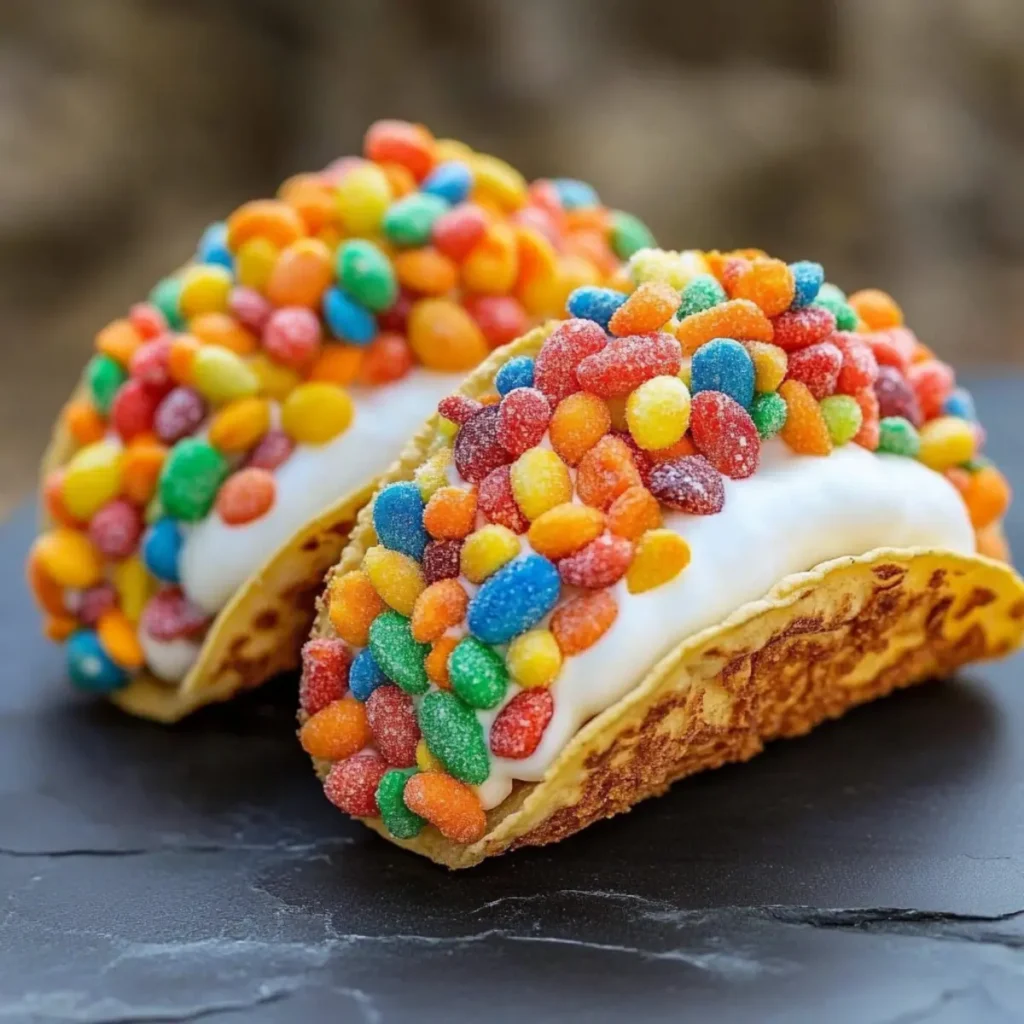
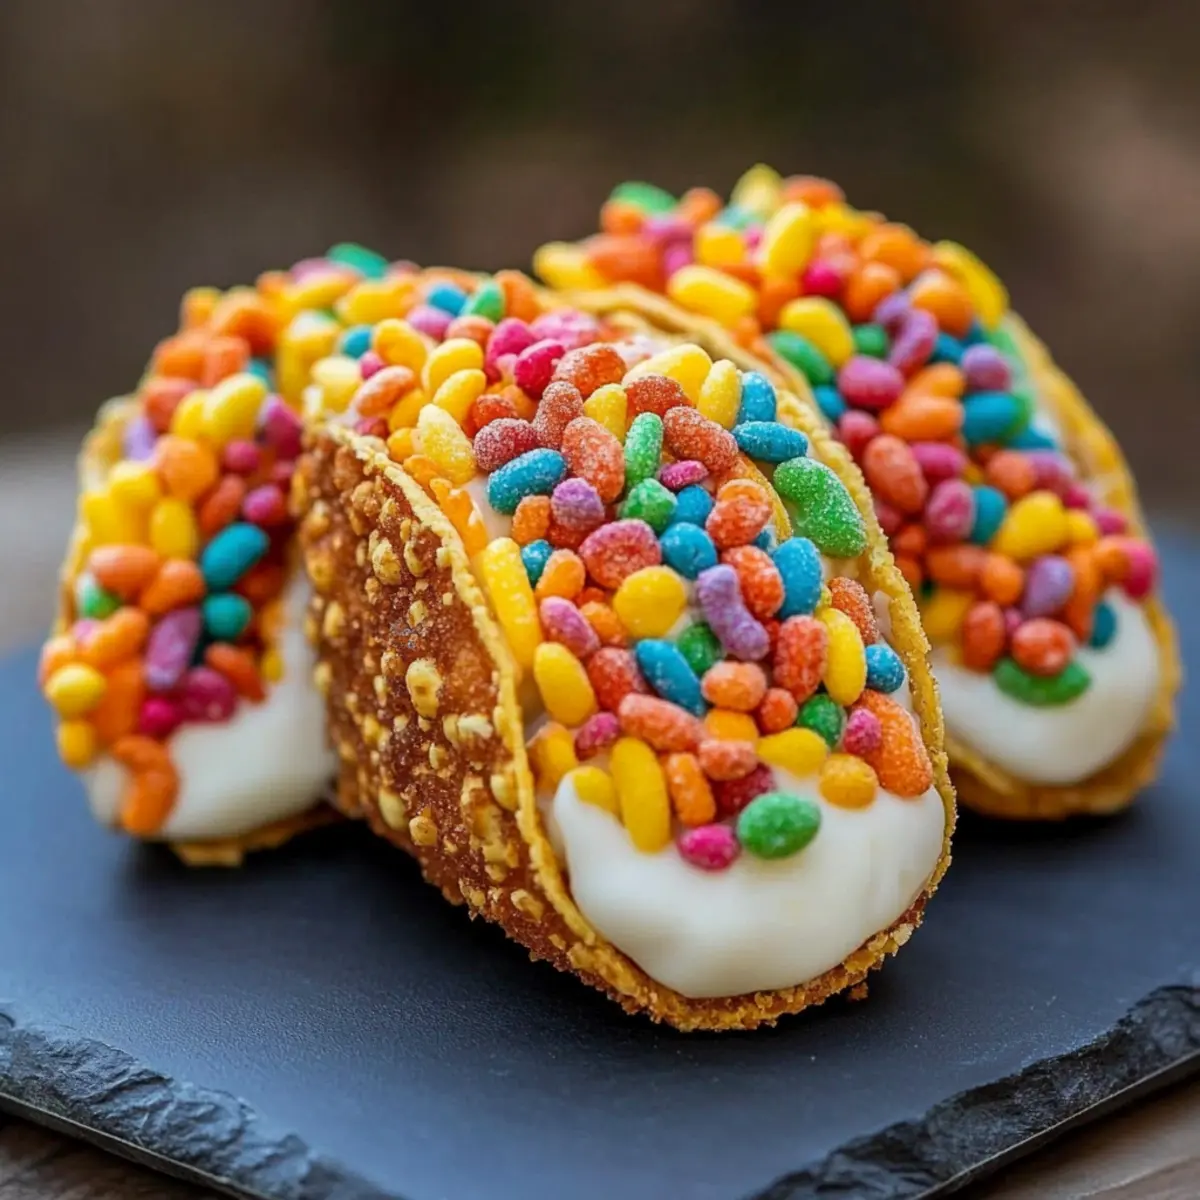
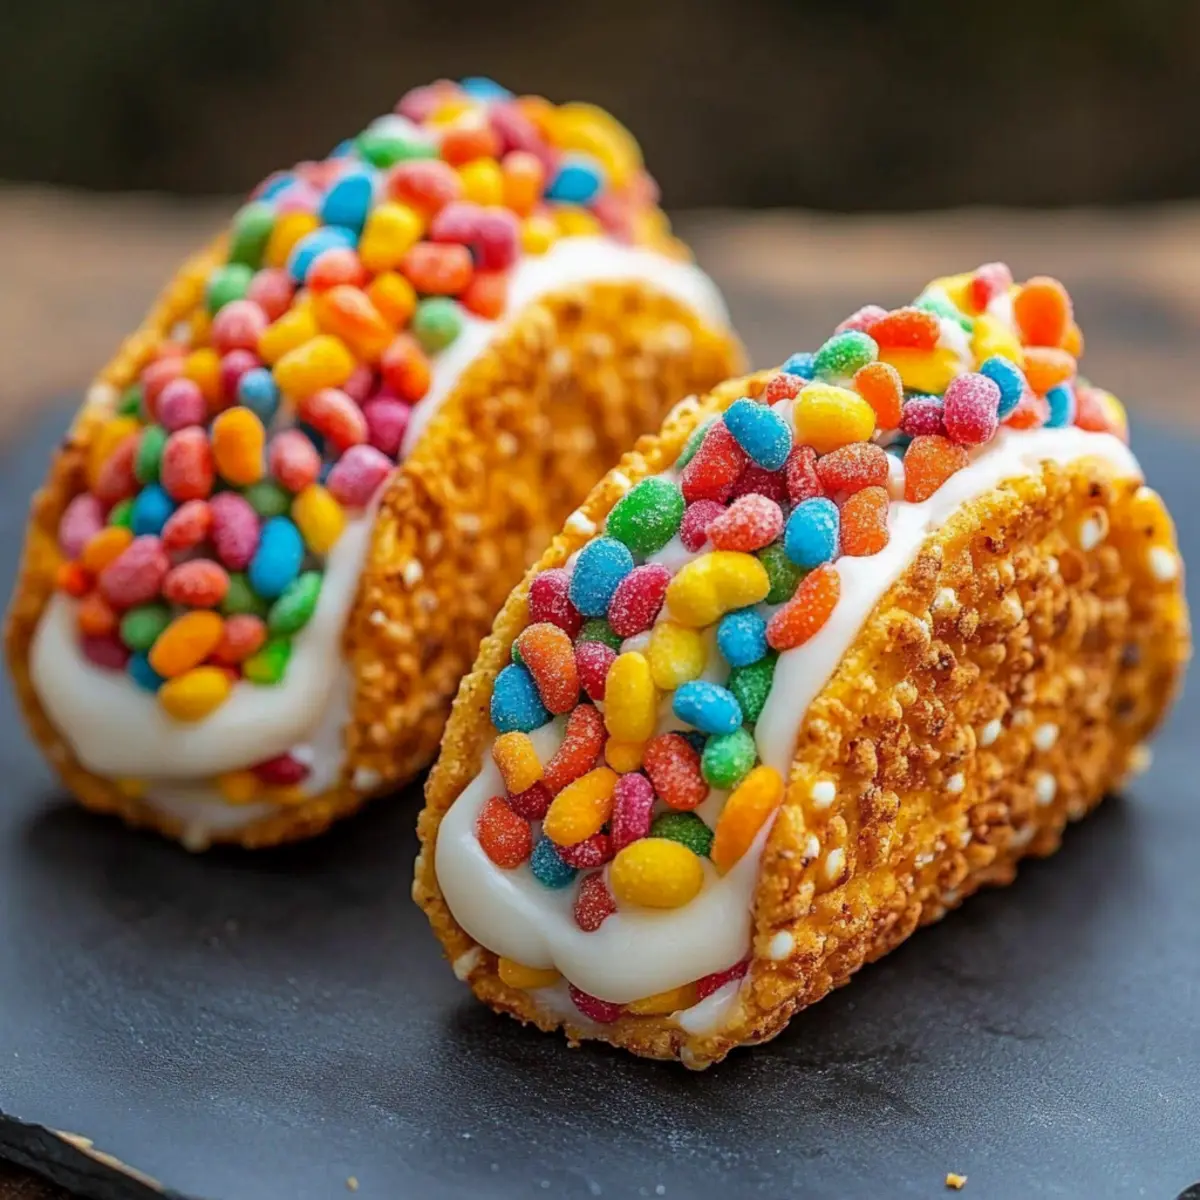
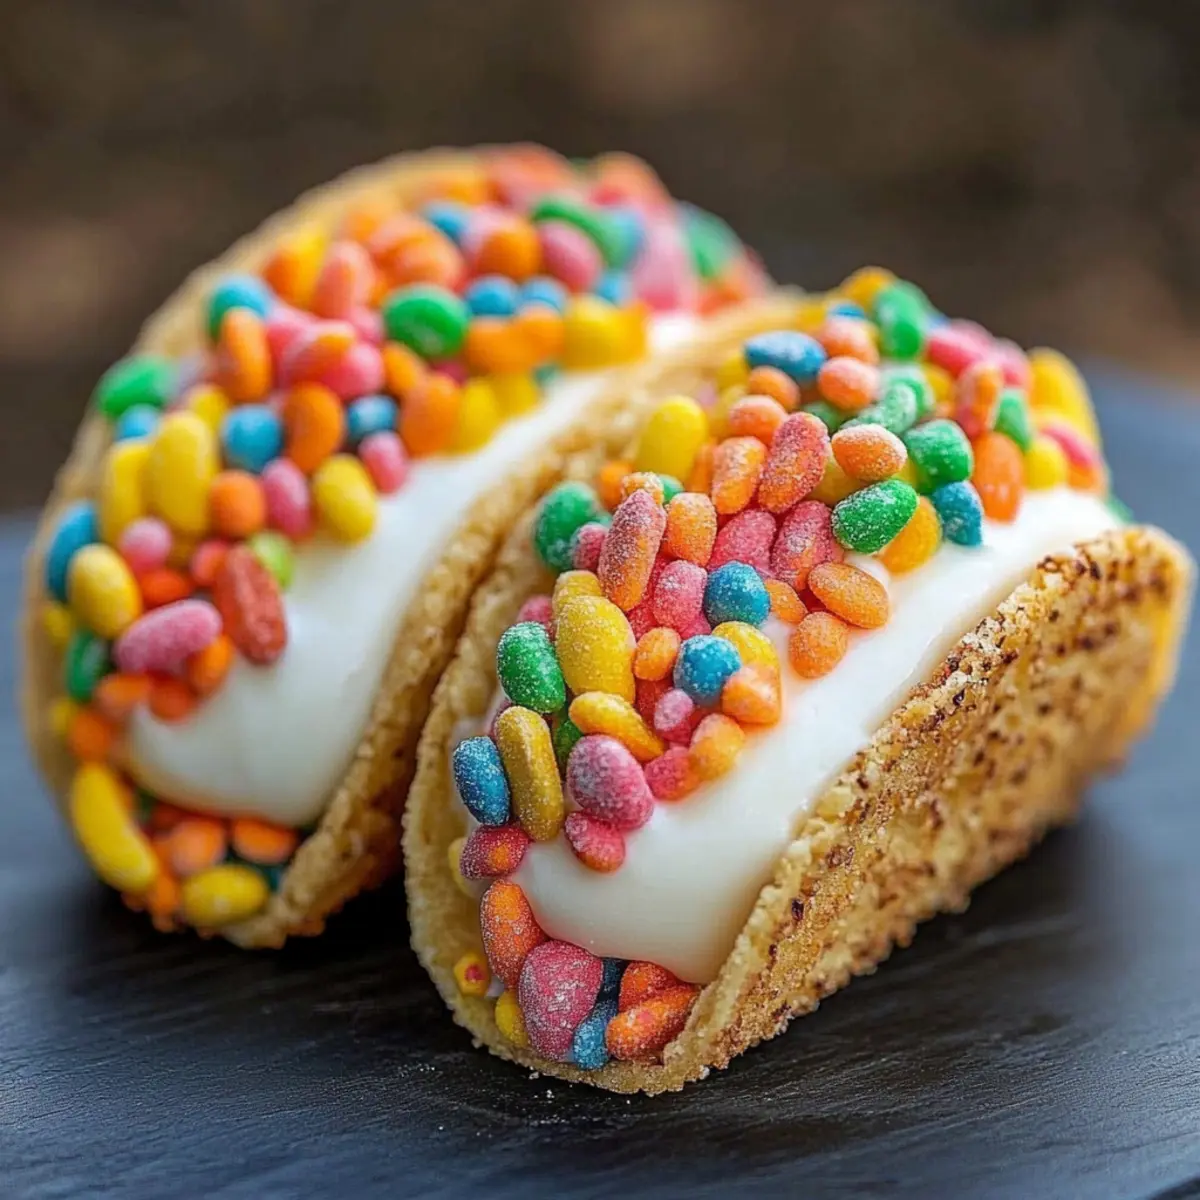
When the sweet, fruity aroma of cereal wafts through the kitchen, memories of childhood mornings come rushing back, and I can’t help but smile. Imagine transforming that nostalgia into a playful dessert that delights both kids and adults: Fruity Pebbles Cheesecake Tacos! These vibrant treats combine a crunchy, buttery shell made from your favorite fruity cereal with a luscious, creamy cheesecake filling that’s impossibly easy to whip up. Perfect for parties, picnics, or just a fun family night at home, these tacos are more than just dessert; they’re an experience that invites laughter and indulgence. What’s even better is the ability to customize them with your favorite cereals—think Cinnamon Toast Crunch for a warm spice or Cocoa Pebbles for a rich chocolate twist. So grab your apron, and let’s bring a burst of color and flavor to your table; you won’t be able to resist taking a bite!
Why You'll Love Fruity Pebbles Cheesecake Tacos
Playful Presentation: These Fruity Pebbles Cheesecake Tacos are as eye-catching as they are delicious, making them a hit at any gathering.
Easy to Make: With just a few simple ingredients and steps, you’ll have these unique desserts ready in no time.
Customizable Fun: Feel free to experiment! Substitute different cereals like Cocoa Pebbles or Cinnamon Toast Crunch for entirely new flavors.
Kid-Friendly: Perfect for a fun family night, these tacos will enchant kids and adults alike, bringing joyful nostalgia.
Make-Ahead Option: Prepare the taco shells and filling ahead of time, making entertaining a breeze without last-minute stress.
Whether for a birthday party or a cozy dessert at home, these vibrant tacos are sure to impress!
Fruity Pebbles Cheesecake Tacos Ingredients
For the Taco Shells
• Fruity Cereal – Provides a punch of sweetness and crunch, so don't hesitate to use any colorful fruity cereal you love!
• Unsalted Butter – Binds the cereal together beautifully; make sure it's melted completely for the best texture.
For the Cheesecake Filling
• Cream Cheese – Essential for that creamy filling; remember to let it soften to room temperature for easy mixing.
• Powdered Sugar – Sweetens everything up, creating that silky texture—sifting it is key for smoothness!
• Vanilla Extract – A splash enhances the flavor profile of the cheesecake filling, making every bite delightful.
• Whipped Cream – Adds a fluffy lightness to the filling; fold gently to keep it airy and delicious.
For Garnishing
• Additional Fruity Cereal – Top your tacos for an extra pop of color and crunch that makes them irresistible!
These Fruity Pebbles Cheesecake Tacos are not only a treat for your taste buds but also a feast for the eyes!
How to Make Fruity Pebbles Cheesecake Tacos
-
Prepare Taco Shells: In a mixing bowl, combine the fruity cereal with melted butter. Stir until each piece is thoroughly coated, creating a delightful mixture that will serve as your taco shells.
-
Mold Shells: Firmly press the cereal mixture into taco-shaped molds or muffin tins. Ensure the mixture is compact; then, chill in the refrigerator for at least 30 minutes, allowing them to set.
-
Make Filling: Beat the softened cream cheese using an electric mixer until fluffy. Gradually add the sifted powdered sugar and vanilla extract, mixing until you achieve a smooth and creamy consistency.
-
Fold in Whipped Cream: Gently fold the whipped cream into the cream cheese mixture. Be careful not to overmix, as this keeps the filling light and airy!
-
Assemble Tacos: After the shells have set, generously spoon the creamy cheesecake filling into each taco shell.
-
Garnish & Serve: Top each taco with additional fruity cereal for that extra vibrant touch. Serve immediately, or chill for a firmer texture.
Optional: Drizzle with chocolate or caramel sauce for a decadent touch!
Exact quantities are listed in the recipe card below.
Storage Tips for Fruity Pebbles Cheesecake Tacos
- Room Temperature: Serve your Fruity Pebbles Cheesecake Tacos immediately after assembling for the best texture. They can be out for up to 2 hours but avoid longer exposure to heat.
- Fridge: Store any leftover tacos in an airtight container for up to 2 days; however, the shells may become softer. For optimal enjoyment, assemble just before serving.
- Make-Ahead: Prepare the taco shells up to 2 days in advance and keep them in an airtight container. The cheesecake filling can be made 24 hours ahead, stored in the fridge until ready to assemble.
- Freezer: It’s best to avoid freezing the assembled tacos, as the creamy filling and crunchy shells don’t hold up well. If necessary, you can freeze the taco shells for up to a month, then re-crisp in the oven before filling.
Expert Tips for Fruity Pebbles Cheesecake Tacos
-
Melt Butter Completely: Ensure your unsalted butter is fully melted before adding it to the cereal for optimal binding.
-
Room Temperature Cream Cheese: Bring your cream cheese to room temperature for easy blending—this prevents lumps and ensures a smooth filling.
-
Gentle Folding: Carefully fold in the whipped cream to maintain its airy texture; overmixing can lead to a denser filling.
-
Chill for Best Texture: Allow taco shells to chill for at least 30 minutes—this step is crucial for maintaining their shape and crunch.
-
Timing is Key: Assemble the Fruity Pebbles Cheesecake Tacos no earlier than 4 hours before serving to keep the shells crisp and fresh.
What to Serve with Fruity Pebbles Cheesecake Tacos?
When planning a delightful meal, consider how these vibrant tacos can harmoniously pair with equally tempting sides and drinks.
-
Refreshing Fruit Salad: A bright mix of seasonal fruits enhances the dessert's sweetness while providing a refreshing contrast to the creamy filling.
-
Chocolate Drizzle: Drizzling melted chocolate over your tacos adds an indulgent touch, elevating the sweetness and richness of each bite.
-
Whipped Cream Topping: A dollop of freshly whipped cream adds lightness, complementing the dense cheesecake filling with a fluffy texture that feels luxurious.
-
Sprinkles Galore: Colorful sprinkles not only make your tacos visually appealing but also add a fun crunch that kids— and adults!— will love.
-
Cold Milk or Milkshake: A classic pairing, sipping on a tall glass of cold milk enhances the flavors and helps wash down the sweetness, making every bite perfect.
-
Coconut Macaroons: The chewy texture of toasted coconut macaroons complements the crunchy taco shells, creating a delightful contrast of flavors.
Feel inspired to mix and match these suggestions for a sweet feast that leaves everyone wanting more!
Fruity Pebbles Cheesecake Tacos Variations
Feel free to let your creativity flow and make this recipe truly your own! These delightful twists will inspire you to try new flavors.
- Chocolate Delight: Substitute Cocoa Pebbles for a rich, chocolatey twist that kids will adore.
- Cinnamon Spice: Use Cinnamon Toast Crunch to infuse a warm, comforting spice flavor into the filling.
- Berry Bliss: Mix in crushed freeze-dried strawberries for a fruity surprise that adds a delightful tartness to the cheesecake.
- Nutty Crunch: Incorporate chopped nuts like pecans or almonds into the taco shell mixture for an extra crunch and flavor boost.
- Zesty Twist: Add a tablespoon of orange liqueur to the filling for an adult version, and don’t forget to garnish with fresh orange zest for a bright touch.
For a fun holiday theme, adapt the colors of your cereal! Imagine red and green for Christmas or pastel colors during Easter. Play around with the vibrant hues—you’re sure to create a festive treat that’s just as tasty as it is beautiful!
Make Ahead Options
These Fruity Pebbles Cheesecake Tacos are perfect for busy weeknights and events when you want to save time! You can prepare the taco shells up to 3 days in advance; simply store them in an airtight container to maintain their crunch. The cheesecake filling can be made up to 24 hours ahead—just refrigerate it in a sealed container to keep it fresh and creamy. When you’re ready to serve, fill the chilled taco shells with the filling, and garnish with additional fruity cereal. This way, you can enjoy a stunning dessert without last-minute stress, ensuring that your Fruity Pebbles Cheesecake Tacos taste just as delightful as if they were freshly made!
Fruity Pebbles Cheesecake Tacos Recipe FAQs
What type of fruity cereal is best for the taco shells?
Absolutely! While Fruity Pebbles is the star of this recipe, you can use any colorful fruity cereal you prefer. Just make sure it’s crunchy to ensure the texture holds up well in your taco shells. I often switch it up with alternatives like Trix or Froot Loops for different flavors and colors!
How should I store leftover Fruity Pebbles Cheesecake Tacos?
For optimal freshness, store your leftover tacos in an airtight container in the refrigerator for up to 2 days. However, be aware that the shells may soften over time. To preserve their crunch, I recommend keeping the filling and taco shells separate until you're ready to enjoy them!
Can I prepare the taco shells ahead of time?
Yes, you can! Prepare the taco shells up to 2 days in advance and store them in an airtight container. This is a great way to save time when you're planning for a gathering. Just be sure to give them a little time at room temperature before filling them with the cheesecake mixture.
Is it possible to freeze the assembled tacos?
I wouldn’t recommend freezing the assembled Fruity Pebbles Cheesecake Tacos since the creamy filling and crunchy shells don’t fare well together in the freezer. However, if you do want to freeze, you can store the taco shells alone in an airtight container for up to a month. When you're ready to use them, just re-crisp the shells in an oven before adding the filling!
What can I do if my cheesecake filling is too thick?
If your cheesecake filling turns out thicker than desired, don’t fret! Simply add a tablespoon or two of whipped cream or milk to loosen it up. Mix gently until you reach your desired consistency. Remember, the key is to maintain that airy texture, so do it gradually!
Are there any allergy considerations for this recipe?
Definitely! This recipe contains dairy (cream cheese and whipped cream), which can pose challenges for those with lactose intolerance or dairy allergies. For a lactose-free version, use dairy-free cream cheese and whipped topping. Additionally, always check your fruity cereal for potential allergens like gluten or nuts, depending on brand variations.

Indulgent Fruity Pebbles Cheesecake Tacos: A Sweet Twist
Equipment
- mixing bowl
- Muffin tins
- electric mixer
Ingredients
For the Taco Shells
- 3 cups Fruity Cereal Any colorful fruity cereal
- ½ cup Unsalted Butter Melted
For the Cheesecake Filling
- 8 ounces Cream Cheese Softened to room temperature
- 1 cup Powdered Sugar Sifted
- 1 teaspoon Vanilla Extract
- 2 cups Whipped Cream Gently folded in
For Garnishing
- ½ cup Additional Fruity Cereal For topping
Instructions
How to Make Fruity Pebbles Cheesecake Tacos
- In a mixing bowl, combine the fruity cereal with melted butter. Stir until each piece is thoroughly coated.
- Firmly press the cereal mixture into taco-shaped molds or muffin tins. Chill in the refrigerator for at least 30 minutes.
- Beat the softened cream cheese using an electric mixer until fluffy. Gradually add the sifted powdered sugar and vanilla extract.
- Gently fold the whipped cream into the cream cheese mixture.
- Spoon the creamy cheesecake filling into each taco shell.
- Top each taco with additional fruity cereal. Serve immediately or chill.

Leave a Reply