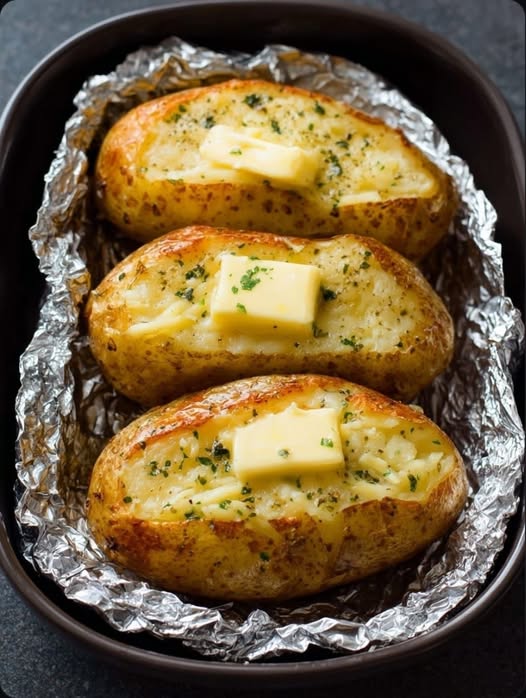
Few dishes deliver comfort and satisfaction quite like a perfectly baked potato. Whether it’s dressed simply with a pat of butter or fully loaded with sour cream, chives, bacon, and cheese, a baked potato never goes out of style.
It’s humble, nostalgic, and—when done right—absolutely crave-worthy. I’ve made this recipe more times than I can count, tweaking little things here and there to get just the right combo of crackly skin and pillowy interior. And now, I’m so excited to pass those tried-and-true steps on to you.
💌 Want more classic, can’t-miss recipes in your inbox? Subscribe to get fresh ideas delivered every week!
Why You’ll Love This Recipe
- Simple and dependable – just 3 ingredients
- Perfectly crisp skin without foil
- Fluffy, tender inside every single time
- Makes a versatile side or a hearty main
- Naturally gluten-free and budget-friendly
Why Russet Potatoes Are Your Best Bet
When it comes to baked potatoes, russet potatoes (also called Idaho potatoes) are the gold standard. Here's why:
- High starch content = super fluffy interior
- Thick skin = ideal for getting that crispy, golden finish
- Hold their shape well = easy to slice, fill, and fluff
Waxy varieties like red or Yukon Golds are great for mashing or roasting, but they’ll never give you the same cloud-like interior as russets.
Ingredients You’ll Need
- 4 large russet potatoes (aim for similar sizes)
- 2 tablespoons olive oil
- 1 tablespoon coarse salt (kosher or sea salt preferred)
Tools You'll Need
- Fork (for poking)
- Sheet pan or foil (for catching drips)
- Oven mitts (those skins get HOT!)
- Tongs (optional, for easy flipping)
Step-by-Step Instructions
1. Preheat Your Oven
Set your oven to 400°F (200°C). This temperature allows the inside to cook slowly while crisping the skin to golden-brown perfection.
2. Clean and Prep the Potatoes
Rinse your russets thoroughly under cold water to remove any dirt. Scrub them well, then pat dry with a towel.
Using a fork, prick each potato 6 to 8 times all over. This helps steam escape during baking and keeps the skins intact (no potato explosions here!).
3. Oil & Salt for Flavor and Crunch
Drizzle a bit of olive oil over each potato and rub it in evenly. This helps crisp the skin and gives it a beautiful golden color.
Next, sprinkle the coarse salt generously on all sides. It adds flavor and helps pull out surface moisture, creating that signature crisp.
4. Bake to Perfection
Place the seasoned potatoes directly on the oven rack, right in the center of the oven. This direct heat is the secret to even cooking and crispy skin.
🛑 Don’t wrap them in foil! It traps steam and makes the skin soft, not crisp.
📍 Tip: Place a foil-lined baking sheet on the lower rack to catch any drips.
Bake for 50–60 minutes, depending on potato size. They’re done when a fork or skewer slides in easily with no resistance.
5. Let Them Rest & Serve
Take the potatoes out and let them sit for 5–10 minutes. This helps the interior steam settle, making them even fluffier when you open them up.
Slice each potato lengthwise, fluff the insides with a fork, and top with your favorite fixings.
Favorite Toppings for Baked Potatoes
- Classic: Butter, sour cream, shredded cheddar, chives
- Hearty: Chili, bacon crumbles, sautéed mushrooms, shredded beef
- Fresh: Salsa, avocado, Greek yogurt, lime
- Cheesy: Melted mozzarella, Parmesan, or a gooey cheese sauce
- Global: Kimchi + sesame oil, tzatziki + cucumber, or curry chickpeas
✨ The options are endless!
Pro Tips for the Best Baked Potatoes
- Pick uniform potatoes so they cook evenly.
- Dry thoroughly before oiling to help the skin crisp.
- Skip the foil—crisp skin needs air, not steam.
- Broil for extra crunch: Pop under the broiler for 1–2 minutes at the end.
- Flip halfway through if you want evenly golden skins on both sides.
Storage & Reheating
- Refrigerate leftovers in an airtight container for up to 4 days.
- Reheat in the oven at 350°F for 15–20 minutes to maintain crisp skin.
- Avoid microwaving, as it softens the skin.
Got extra baked potatoes? Use them to make:
- Loaded potato skins
- Twice-baked potatoes
- Potato salad
- Breakfast hash
FAQs
Can I make them in advance?
Absolutely! Bake them ahead, let cool, and reheat in the oven before serving.
What’s the best way to fluff the inside?
After slicing lengthwise, use a fork to gently mash the insides and create that pillowy texture—just don’t tear the skin.
Can I use butter instead of oil?
Yes! Butter works, but olive oil gives better crisping. You can also use a combo of both for flavor and crunch.
Conclusion
Once you try this method, you’ll never look at a baked potato the same way again. With just a little oil, some good salt, and the right potato, you’ll have a dish that’s equal parts simple and spectacular.
Whether you're building a potato bar for game day or serving these alongside a juicy steak, one thing’s for sure: everyone will ask how you got that perfect crispy skin.
Happy baking—and don’t forget to pass the butter. 🥔✨
More Comforting Sides You’ll Love
- Garlic Herb Mashed Potatoes
- Cheesy Cauliflower Gratin
- Roasted Brussels Sprouts with Balsamic Glaze
- Crispy Sweet Potato Wedges
- Creamy Mushroom Parmesan Skillet
Let’s See Those Spuds!
Tried this recipe? Snap a pic and tag it with #MyPerfectPotato on Pinterest or Instagram! I’d love to see how you dressed yours up. 🧂💛
Want a printable recipe card? Just say the word!

Leave a Reply