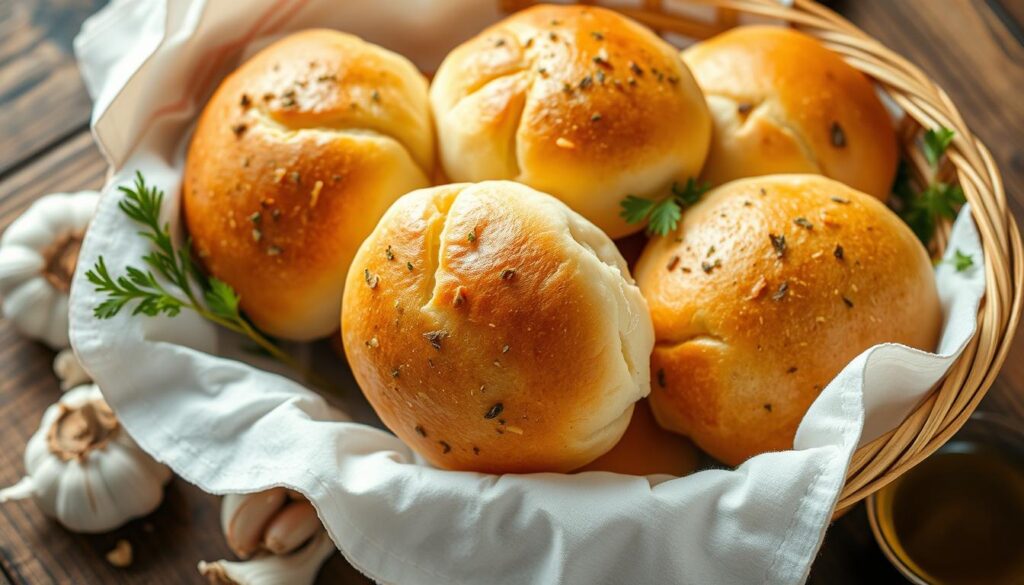
Imagine biting into a warm, fresh garlic bread roll. You feel its soft, fluffy texture and enjoy the rich garlic flavor. Homemade garlic bread is all about this experience. In addition, with a simple recipe, you can make delicious garlic bread rolls for any event. Whether you love traditional garlic bread or want to try something new, making your own rolls is a joy.
Making garlic bread at home is easy and rewarding. Furthermore, you get to choose the ingredients and flavors. With basic ingredients and a simple recipe, you can make tasty garlic bread rolls. In this article, we'll dive into the world of garlic bread rolls. We'll cover the basics of homemade garlic bread and share tips for perfect rolls.
Key Takeaways
- Garlic bread rolls are a delicious and easy-to-make treat
- Making homemade garlic bread allows for control over ingredients and flavors
- An easy garlic bread recipe is all you need to get started
- Garlic bread rolls are perfect for any occasion, from casual gatherings to special events
- With a few basic ingredients, you can create mouthwatering garlic bread rolls at home
The Art of Making Perfect Garlic Bread Rolls
Making garlic bread rolls is a fun and rewarding task. It's great for both experienced bakers and beginners. With the right ingredients and techniques, you can make savory garlic bread rolls that everyone will love.
To start, you need to know the basics of what goes into garlic bread. In addition, yeast, flour, and garlic are key. So, by choosing the best quality and amount of these, you can make your garlic bread rolls just the way you like them.
One of the best things about making garlic bread rolls at home is using fresh ingredients. You can also try new flavors by adding herbs or spices to the dough. Here are some tips to help you make great garlic bread rolls:
- Use high-quality ingredients, including fresh garlic and yeast, to ensure the best flavor and texture.
- Experiment with different flavor combinations, such as herbs or spices, to create a unique taste experience.
- Furthermore, control the temperature and rising time of your dough to produce a light and airy texture.
By following these tips and practicing, you can become a pro at making delicious garlic bread rolls. They're perfect as a side dish or as a base for sandwiches. Savory garlic bread rolls add a tasty touch to any meal.
Essential Ingredients for Success
To make delicious garlic bread twists or garlic herb bread rolls, you need top-notch ingredients. Fresh garlic is a must for a vibrant flavor. Choose herbs like parsley, rosemary, or thyme to complement garlic.
Some key ingredients to focus on include:
- High-quality flour, such as bread flour or all-purpose flour
- Moreover, fresh yeast, which helps the dough rise and gives the bread its light texture
- Likewise, salt, which enhances the flavor of the garlic and herbs
- Also, unsalted butter, which adds richness and tenderness to the bread
When mixing these ingredients, it's key to know how they work together. Yeast fermentation can be affected by temperature and humidity. Furthermore, using a thermometer helps ensure the dough rises right. Also, fresh herbs are more potent than dried ones, so use them sparingly.
By using these essential ingredients and understanding their interaction, you can make mouthwatering garlic bread twists or rolls. Whether you're an experienced baker or just starting, success comes from quality ingredients and careful preparation.
Required Kitchen Equipment and Tools
To make delicious garlic parmesan rolls, you need the right kitchen tools. Furthermore, the right utensils and baking surfaces can greatly improve your baked garlic bread rolls. We'll look at the essential tools, optional but useful items, and baking surface options to help you start.
For garlic parmesan rolls, having the right tools is key. Also, you'll need a mixing bowl, a baking sheet, and a measuring cup. These tools help you mix, measure, and bake your rolls perfectly.
Must-Have Utensils
- Mixing bowl
- Baking sheet
- Measuring cup
Optional but Helpful Tools
While not essential, some tools can make making garlic parmesan rolls easier. Tools like a stand mixer, a pastry brush, and a silicone spatula are helpful. A stand mixer can mix and knead the dough. Also, a pastry brush applies garlic butter, and a silicone spatula scrapes the bowl and folds the dough.
Baking Surface Options
For baking garlic parmesan rolls, you have several options. You can use baking sheets, pizza stones, or cast-iron skillets. Each has its own benefits and drawbacks. Moreover, the best choice depends on your preferences and the type of rolls you're making.
With the right kitchen tools, you're ready to make delicious garlic parmesan rolls. These rolls will surely please even the most discerning eaters.
| Utensil | Description |
|---|---|
| Mixing Bowl | Used to mix and combine ingredients |
| Baking Sheet | Used to bake garlic parmesan rolls |
| Measuring Cup | Used to measure ingredients |
Mastering the Perfect Dough
To make delicious homemade garlic bread, you need to perfect the dough. This means using the right flour, yeast, and mixing techniques. A good easy garlic bread recipe will help, but knowing each ingredient's role is key.
Here are some important tips for making the dough:
- Type of flour: Pick a high-quality flour for the best taste and texture.
- Yeast: Active dry yeast makes the dough rise and gives it a light feel.
- Mixing and kneading: Mix gently and knead for the right time to develop the dough's gluten.
By following these tips and a reliable easy garlic bread recipe, you'll make tasty homemade garlic bread. Moreover, handle the dough carefully and let it rise for the right time. This ensures the perfect mix of ingredients and texture.
With practice and patience, you'll get the dough right for your homemade garlic bread. Try different ingredients and methods to find what works best for you and your easy garlic bread recipe.
| Ingredient | Importance | Tips |
|---|---|---|
| Flour | High | Choose a high-quality flour for the best texture and flavor. |
| Yeast | High | Use active dry yeast for the best results. |
| Mixing and kneading | Medium | Combine ingredients gently and knead for the right amount of time. |
Creating the Signature Garlic Butter
To make delicious rolls, you need a rich and flavorful garlic butter. This is what makes garlic bread rolls special. Additionally, the garlic butter is key in garlic bread roll ups, as it's spread throughout the roll.
When it comes to garlic, you have two main options: fresh or dried. Fresh garlic gives a more vibrant flavor. Dried garlic is more convenient and lasts longer.
Fresh vs. Dried Garlic
Fresh garlic is ideal for making garlic bread rolls because of its potent flavor and aroma. However, it can be more time-consuming to prepare. Dried garlic, on the other hand, is easier to use but may lack the depth of flavor that fresh garlic provides.
Herb Combinations
Combining herbs with garlic can add an extra layer of flavor to your rolls. Some popular herb combinations include parsley, rosemary, and thyme. These herbs complement the flavor of garlic and can enhance the overall taste of your garlic bread roll ups.
Butter Selection Tips
Choosing the right type of butter is also crucial for making delicious garlic bread rolls. Look for high-quality, unsalted butter that will allow the flavor of the garlic to shine through.
Step-by-Step Rolling Technique
To make perfect savory garlic bread rolls, you need to get the rolling right. First, split the dough into equal parts. This depends on how big you want your garlic bread twists to be. Then, roll out each piece into a long, thin rope.
After that, cut the rope into strips, about 1-2 inches wide. You can use a sharp knife or a pastry cutter for a clean cut. Now, shape your strips into garlic bread rolls. In addition, hold a strip vertically and wrap it around itself to form a coil. Tuck the end under the roll to keep it in place.
Here are some tips for the perfect shape and size of your savory garlic bread rolls:
- Make sure the dough is at room temperature.
- Use a light touch when rolling out the dough.
- Don't overwork the dough.
By following these steps and tips, you'll make delicious savory garlic bread rolls and twists. Furthermore these will impress your family and friends. Remember, practice makes perfect. So, don't worry if your first batch isn't exactly what you hoped for.
Proofing and Rising Tips
Making garlic herb bread rolls or garlic parmesan rolls needs careful proofing and rising. This step is key for the right texture and taste. Furthermore, to get the best rise, you must help yeast grow and dough expand.
Temperature Considerations
A warm, draft-free spot is best for proofing. The ideal temperature is between 75°F and 80°F, great for yeast. Additionally, don't put your dough near direct sunlight or heating vents to avoid uneven rising.
Time Management
The proofing time varies based on yeast type and environment temperature. It usually takes 1 to 2 hours for the dough to double. Check your dough gently to see if it's ready.
Visual Cues for Perfect Proofing
Check for these signs to know if your dough is ready: it should have doubled, have big bubbles, and feel soft and springy. Furthermore ,with these tips, you'll make delicious garlic bread rolls that will wow everyone.
By using these proofing and rising tips, you'll make tasty garlic bread rolls for any event. Whether it's garlic herb or parmesan rolls, success comes from the proofing and rising.
| Proofing Stage | Time | Temperature |
|---|---|---|
| Initial Rise | 1 hour | 75°F - 80°F |
| Final Rise | 30 minutes | 75°F - 80°F |
Baking Temperature and Timing Guide
To get perfectly baked rolls, knowing the right baking temperature and timing is key. A conventional oven works well, but a convection oven can make the crust crisper.
Here are some general guidelines :
- Preheat your oven to 375°F (190°C) for a conventional oven or 350°F (180°C) for a convection oven.
- Bake the rolls for 12-15 minutes, or until they're golden brown and crispy on the outside.
- Furthermore, for an extra crispy crust, try baking the rolls for an additional 2-3 minutes.
The baking time can change based on the size and shape of your rolls. Keep an eye on them after 10 minutes and adjust the baking time as needed.

To ensure your homemade garlic bread is perfectly baked, follow these tips:
- Use a thermometer to check the internal temperature of the rolls. They should be at least 190°F (88°C) when fully baked.
- In addition, don't overcrowd the baking sheet, as this can affect the evenness of the bake.
- Also, rotate the baking sheet halfway through the baking time to ensure even browning.
By following these guidelines and tips, you'll be able to achieve perfectly baked garlic bread rolls. They will have a crispy crust and a soft, fluffy interior.
Furthermore, if you're a fan of homemade bread, check out this French Bread Rolls recipe for another delicious and fluffy option to enjoy.
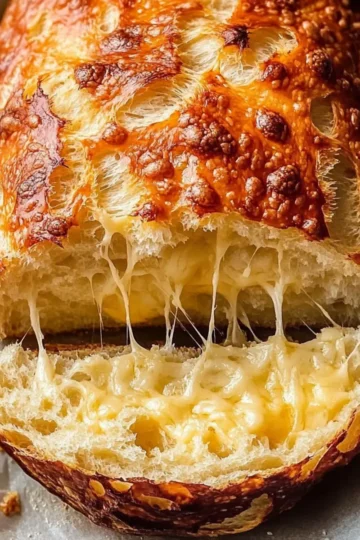
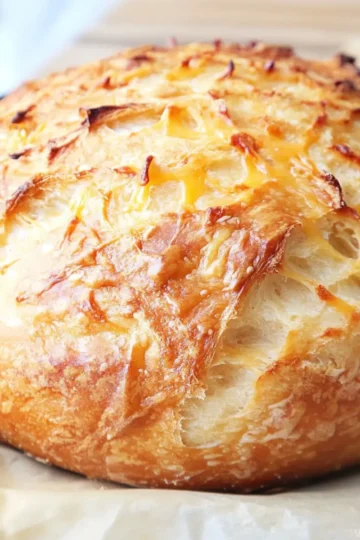
Creative Variations and Flavors
They offer endless possibilities. You can make delicious garlic bread rolls with many flavors and ingredients. Start by adding different cheeses, like mozzarella or parmesan, for a cheesy taste.
Here are some tasty options:
- Garlic and herb: Mix garlic with herbs like parsley, rosemary, or thyme.
- Cheese-stuffed: Add melted mozzarella or parmesan cheese inside for extra flavor.
- International inspirations: Add Italian or French flavors, like sun-dried tomatoes or caramelized onions, for a unique twist.
These creative ideas can make your rolls even better. They're perfect with any meal. With a bit of experimentation, you can make
Storage and Reheating Methods
To keep your garlic bread roll ups fresh, store them right. Place them in an airtight container at room temperature for up to 2 days. For longer storage, refrigerate or freeze them. Wrap them tightly in plastic wrap or aluminum foil to prevent drying out when refrigerating.
Reheating is key for savory garlic bread rolls to get the perfect texture and flavor. You can reheat them in the oven or microwave. Preheat the oven to 350°F (180°C) and bake for 5-7 minutes. For the microwave, wrap the roll in a damp paper towel and heat for 20-30 seconds.
Here are some tips for storing and reheating garlic bread roll ups:
- Store in an airtight container to maintain freshness
- Also, refrigerate or freeze for longer storage
- Moreover, reheat in the oven or microwave for the best results
- In addition, wrap in plastic wrap or aluminum foil to prevent drying out
By following these tips, you can enjoy your garlic bread roll ups and savory garlic bread rolls for a longer time.
| Storage Method | Storage Time | Reheating Method |
|---|---|---|
| Airtight container at room temperature | Up to 2 days | Oven or microwave |
| Refrigerator | Up to 5 days | Oven or microwave |
| Freezer | Up to 2 months | Oven or microwave |
Common Troubleshooting Solutions
When making garlic herb bread rolls or garlic parmesan rolls, you might face some issues. In addition, we've gathered common solutions to help you. Whether it's texture, flavor, or rising problems, we've got you covered.
Dense or dry texture in garlic bread rolls can be fixed. Adjust the dough's liquid or proofing time. Too much or too little garlic can be balanced by changing the recipe's garlic amount.
Texture Problems
- Check the yeast: Make sure the yeast is active and not expired.
- Adjust the liquid: Ensure the right amount of liquid is used in the dough to achieve the perfect consistency.
- Proofing time: Adjust the proofing time to allow the dough to rise properly.
Flavor Issues
- Garlic amount: Adjust the amount of garlic used in the recipe to achieve the desired flavor.
- Herb combinations: Experiment with different herb combinations to find the perfect blend for your garlic herb bread rolls.
Rising Challenges
To overcome rising challenges, ensure the yeast is activated. Also, keep the environment warm and draft-free. This will help your garlic parmesan rolls rise to perfection.
Make-Ahead and Freezing Instructions
Enjoying homemade garlic bread is easier when you can make it ahead. With a simple recipe, you can prepare the dough, let it rise, and freeze the rolls. This way, you can have freshly baked garlic bread whenever you want.
To freeze your rolls, wrap them tightly in plastic wrap or aluminum foil. This prevents freezer burn and keeps the rolls fresh. You can also put the wrapped rolls in a freezer-safe bag or container for extra protection.
Proper Wrapping Techniques
- Wrap each roll individually in plastic wrap or aluminum foil
- In addition, place the wrapped rolls in a freezer-safe bag or container
- Furthermore, label the bag or container with the date and contents
Thawing Guidelines
To thaw your frozen garlic bread rolls, leave them at room temperature for a few hours. Or thaw them overnight in the refrigerator. Once thawed, bake the rolls in the oven for a crispy crust and soft interior.

By following these simple steps, you can enjoy delicious homemade garlic bread whenever you want. This easy recipe is perfect for parties or quick snacks.
| Freezing Method | Thawing Time | Baking Temperature |
|---|---|---|
| Individual wrapping | 2-3 hours | 375°F |
| Freezer-safe bag | 4-5 hours | 400°F |
Serving Suggestions and Pairings
They are great for many occasions. They can be a side dish, snack, or even a light meal. Garlic bread roll ups are perfect for parties and can be filled with different ingredients.
Here are some ways to serve your rolls:
- Pair them with a green salad for a light and refreshing meal
- Serve them alongside pasta dishes, such as spaghetti or lasagna
- In addition, use them as a base for mini sandwiches or sliders
- Moreover, enjoy them as a snack on their own, or with a dipping sauce
They go well with drinks like iced tea or fresh lemonade. For a richer treat, pair them with creamy soups like tomato soup or cream of broccoli soup.
In conclusion, garlic bread rolls and garlic bread roll ups are delicious and versatile. Their soft texture and garlic flavor make them a hit with everyone.
| Garlic Bread Roll Variations | Description |
|---|---|
| Classic Garlic Bread Rolls | Soft, fluffy rolls filled with garlic butter |
| Garlic Bread Roll Ups | Rolled up dough filled with garlic butter and herbs |
| Cheese-Stuffed Garlic Bread Rolls | Garlic bread rolls filled with melted cheese |
Tips for Special Dietary Needs
Savory garlic bread rolls are for everyone, no matter their dietary needs. You can make garlic herb bread rolls work for gluten-free or vegan diets.
To make gluten-free garlic bread rolls, swap out regular flour for gluten-free options. Almond flour, coconut flour, and rice flour are good choices. Here's how to adapt for gluten-free:
Gluten-Free Adaptations
- Use a mix of gluten-free flours for the right feel
- Additionally, add xanthan gum for better texture and structure
- Moreover, choose a gluten-free yeast for dough to rise right
For vegan garlic bread rolls, swap butter and cheese for vegan versions. Here's how to adapt for vegan:
Vegan Alternatives
- Use vegan butter like Earth Balance
- Moreover, replace cheese with soy cheese or nutritional yeast
- Go for almond or soy milk instead
With these tips, you can enjoy tasty garlic bread rolls, no matter your dietary needs. Whether gluten-free or vegan, you won't miss out on the flavor.
| Dietary Need | Adaptation | Tips |
|---|---|---|
| Gluten-Free | Use gluten-free flours | Combine flours for right texture, add xanthan gum |
| Vegan | Use vegan butter and cheese alternatives | Choose vegan-friendly milk alternative, use nutritional yeast for cheese flavor |
Professional Baker's Secret Tips
To make the perfect garlic parmesan rolls, professional bakers have some secrets. They say using fresh garlic and real parmesan cheese is key. Also, controlling the dough's proofing is important for the right texture.
They also suggest trying new flavors. Adding herbs like thyme or rosemary can make baked garlic bread rolls taste amazing. Mixing garlic and parmesan cheese creates a rich flavor.
Here are some professional baker's secret tips to remember:
- Use a mix of all-purpose and bread flour for a soft crumb
- Moreover, avoid overmixing the dough to prevent it from becoming dense
- In addition, let the dough rise for at least an hour for the best flavor
- Brush the rolls with garlic butter before baking for extra flavor
By using these tips, you can make garlic parmesan rolls that will wow everyone. Whether you're an experienced baker or just starting, these secrets will improve your skills. With practice and patience, you'll soon be baking delicious baked garlic bread rolls like a pro.
"The key to making perfect garlic bread rolls is to use high-quality ingredients and to not be afraid to experiment with new flavor combinations."
| Ingredient | Quantity |
|---|---|
| Garlic | 3 cloves |
| Parmesan cheese | 1 cup |
| Flour | 2 cups |
Conclusion
Our journey through garlic bread rolls shows that making them is an art. Homemade garlic bread has a soft texture and a delicious garlic smell. This is something store-bought can't offer.
With the guide we've shared, you can make your own garlic bread rolls at home. Also, you can stick to the classic recipe or try new flavors. The joy of biting into a warm, golden garlic roll is unmatched.
Additionally, if you love comforting baked goods, try this Homemade Cinnamon Apple Bread for a warm, sweet treat that's perfect for any occasion.
Furthermore, enjoy these rolls with your favorite meals or as a snack. The options are endless. So, get ready to bake and let the smell of garlic bread welcome everyone to a delicious treat.
FAQ
What are the essential ingredients for making perfect garlic bread rolls?
To make perfect garlic bread rolls, you need high-quality flour, active dry yeast, and warm water. Also, salt, butter, and fresh garlic are key. The right mix of these ingredients gives you soft, fluffy, and flavorful rolls.
What kitchen equipment and tools are needed to make garlic bread rolls?
You'll need a mixing bowl, a stand mixer (optional), and a baking sheet. A rolling pin and a pastry brush are also essential. Optional tools include a dough scraper, a bread lame, and a pizza stone or cast-iron skillet for baking.
How do I achieve the perfect dough for garlic bread rolls?
Use the right flour and activate the yeast properly. Follow the right mixing and kneading techniques. Paying attention to the dough's texture ensures soft and fluffy rolls.
How do I create the signature garlic butter for my garlic bread rolls?
Mix fresh minced garlic, softened butter, and herbs like parsley or oregano. Balance the garlic with butter and herbs for a delicious spread.
What is the best way to roll and shape the garlic bread dough?
Roll the dough into a rectangle, then cut it into strips. Twist or roll the strips into rolls or twists. This method gives your rolls the perfect texture and look.
How do I ensure proper proofing and rising for my garlic bread rolls?
Keep the right temperature and manage proofing time. Look for visual cues like the dough doubling and air bubbles. This ensures the perfect rise and texture.
What is the ideal baking temperature and timing for garlic bread rolls?
Bake at 400°F (200°C) for 12 to 18 minutes. Watch the rolls to get the golden-brown color and crispy texture.
Can I make garlic bread rolls ahead of time and freeze them?
Yes, you can freeze garlic bread rolls. Wrap them tightly in plastic wrap or foil. Thaw at room temperature or in the fridge before reheating.
What are some common troubleshooting solutions for garlic bread rolls?
For dense or dry rolls, adjust ingredients and proofing time. For flavor or rising issues, tweak the recipe and baking techniques. These changes can solve common problems.
How can I adapt garlic bread rolls to accommodate special dietary needs?
Use gluten-free flour and vegan butter or cheese for special diets. Adjust the recipe and follow proper techniques to make suitable garlic bread rolls.

Leave a Reply