Introduction
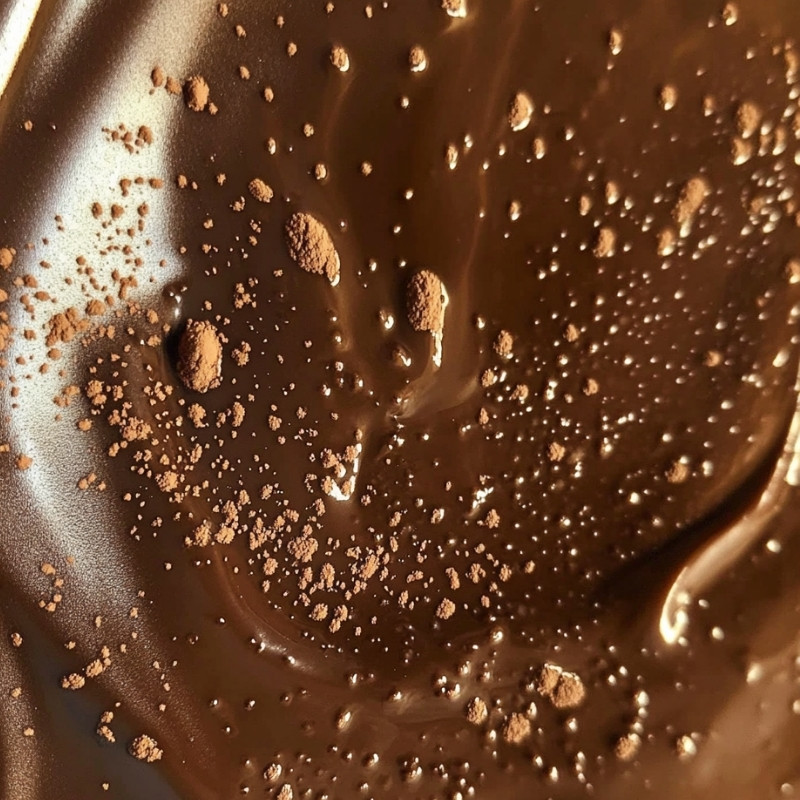
A luscious and glossy chocolate mirror glaze that takes your dessert to the next level. Perfect for special occasions, this glaze adds a flawless, reflective finish to your cakes, making them not just delicious but also a visual masterpiece.
Detailed Ingredients with measures
- 150 g dark chocolate (70% cocoa), finely chopped
- 60 g cocoa powder
- 150 g granulated sugar
- 150 ml water
- 100 ml heavy cream
- 10 g powdered gelatin
- 60 ml cold water
Prep Time
10 mins
Cook Time, Total Time, Yield
Cook Time: 15 mins
Total Time: 25 mins
Yield: 1 cake glaze
Directions:
1. In a small bowl, mix the gelatin with 60 ml cold water and let it bloom for 5 minutes.
2. In a small saucepan, combine sugar, cocoa powder, and 150 ml water. Heat over medium heat while whisking until the sugar and cocoa dissolve completely.
3. Add the heavy cream and bring the mixture to a gentle simmer.
4. Remove from heat and stir in the bloomed gelatin until completely dissolved.
5. Place the chopped dark chocolate in a separate bowl and pour the hot mixture over it. Let it sit for 2 minutes before stirring until smooth.
6. Strain the glaze through a fine sieve to remove any lumps and ensure a silky texture.
7. Let the glaze cool to approximately 32°C before pouring over a chilled cake for the perfect mirror effect.
8. Pour in a circular motion from the center, ensuring even coverage. Let excess glaze drip off, then transfer the cake to a serving plate.
9. Allow the glaze to set for at least 1 hour before serving.
Detailed Directions and Instructions
Step 1: Bloom the Gelatin
In a small bowl, mix the gelatin with 60 ml of cold water and let it sit for 5 minutes to bloom.
Step 2: Prepare the Cocoa Mixture
In a small saucepan, combine granulated sugar, cocoa powder, and 150 ml of water. Heat this mixture over medium heat while whisking continuously until the sugar and cocoa are fully dissolved.
Step 3: Add Cream and Simmer
Add the heavy cream to the mixture and bring it to a gentle simmer, taking care not to let it boil.
Step 4: Incorporate the Gelatin
Remove the saucepan from heat and stir in the bloomed gelatin until it is completely dissolved.
Step 5: Melt the Chocolate
Place the finely chopped dark chocolate in a separate bowl. Pour the hot cocoa mixture over the chocolate and let it sit for 2 minutes. Afterward, stir until the mixture is smooth.
Step 6: Strain the Glaze
Strain the glaze through a fine sieve to eliminate any lumps and ensure a silky texture.
Step 7: Cool the Glaze
Allow the glaze to cool down to approximately 32°C before using it on your cake.
Step 8: Pour the Glaze
Pour the glaze over the chilled cake in a circular motion starting from the center. Ensure even coverage as it flows over the sides. Allow any excess glaze to drip off.
Step 9: Set the Glaze
Transfer the glazed cake to a serving plate and let the glaze set for at least 1 hour before serving.
Notes
Storage
The glaze should be used immediately after preparation for the best sheen and texture.
Temperature Check
Ensure the glaze cools to the correct temperature before pouring; this is crucial for achieving the mirror effect.
Chilled Cake Requirement
Always pour the glaze over a chilled cake for optimal results.
Alternative Chocolates
Using different types of chocolate will affect the color and flavor of the glaze; dark chocolate gives the best mirror finish.
Serving Suggestions
Pair the glaze with a complementary cake flavor or garnish for visual appeal.
Storage Instructions
Room Temperature
If you plan to use the glaze within a few hours, it can be kept at room temperature. However, ensure it is covered to avoid any contamination.
Refrigeration
For longer storage, refrigerate the prepared glaze in an airtight container. It can be stored in the fridge for up to one week.
Reheating
When ready to use, gently reheat the glaze over low heat or in a microwave, ensuring it does not exceed 32°C again before pouring.
Serving Suggestions
This chocolate mirror glaze is perfect for elevating layered cakes, mousse cakes, or even simple sheet cakes. Serve the glazed cake alongside fresh berries or a scoop of vanilla ice cream for contrasting flavors. For a festive touch, consider garnishing with edible gold leaf or seasonal fruits.
Nutritional Information
Per serving (based on 12 servings):
Calories: 145
Total Fat: 9 g
Saturated Fat: 5 g
Cholesterol: 15 mg
Sodium: 6 mg
Total Carbohydrates: 15 g
Dietary Fiber: 1 g
Sugars: 12 g
Protein: 2 g
Ingredient Substitutions
Dark Chocolate
You can substitute dark chocolate with semi-sweet chocolate for a sweeter flavor, though it will alter the richness of the glaze.
Cocoa Powder
Unsweetened cocoa powder can be used interchangeably with Dutch-processed cocoa powder for a different flavor profile.
Granulated Sugar
If you're looking for a healthier option, consider using coconut sugar or agave nectar, adjusting the quantity to taste.
Heavy Cream
For a lighter version, use half-and-half or a dairy-free cream alternative to reduce calories.
Gelatin
Vegetarians can substitute powdered gelatin with agar-agar, following package instructions for the right conversion ratio.
Cook Techniques
Blooming Gelatin
Ensure the gelatin is mixed with cold water and allowed to sit for about 5 minutes to hydrate fully before use. This step is crucial for achieving the right texture in the glaze.
Mixing Ingredients
Combine sugar, cocoa powder, and water in a saucepan, stirring continuously over medium heat until fully dissolved. This ensures a smooth and integrated base for your glaze.
Simmering the Mixture
Gently simmer the mixture after adding heavy cream. Avoid boiling, as high heat can cause the dairy to separate and alter the glaze's texture.
Dissolving Gelatin
After removing the mixture from the heat, stir in the bloomed gelatin until it is completely dissolved. This step is essential for the glaze's firmness and shine.
Incorporating Chocolate
Pour the hot mixture over the chopped dark chocolate and let it sit for 2 minutes before stirring. This helps to melt the chocolate evenly without overheating it.
Straining the Glaze
Strain the glaze through a fine sieve to achieve a smooth, lump-free texture. This adds to the glossy finish of the final product.
Temperature Control
Let the glaze cool to about 32°C before pouring. This temperature is optimal for achieving a perfect mirror effect on your cake.
Pouring Technique
When pouring the glaze, use a circular motion starting from the center and moving outward. This ensures an even coating over the entire surface of the cake.
Setting the Glaze
Allow the glazed cake to set at room temperature for at least 1 hour. This helps the glaze firm up and adds to the overall presentation and texture.
FAQ
Can I use chocolate with a lower cocoa content for the glaze?
Yes, you can use milk chocolate, but the glaze will be sweeter and less intense. Adjust the sugar accordingly.
How do I store leftover mirror glaze?
You can store leftover mirror glaze in an airtight container in the refrigerator for up to a week. Reheat gently before using.
What should I do if my glaze is too thick?
If the glaze is too thick, gently reheat it over a double boiler or in the microwave, adding a little water to reach the desired consistency.
Can I color the mirror glaze?
Yes, food gel colorings can be added during the chocolate integration step to achieve desired colors without affecting the glaze's texture.
How can I avoid air bubbles in my glaze?
Straining the glaze through a fine sieve will help eliminate air bubbles. Additionally, pouring slowly can minimize bubble formation.
What types of cakes work best with mirror glaze?
Mirror glaze works well on smooth cakes like mousse cakes, cheesecake, or fine chocolate cakes. Ensure the cake is chilled for best results.
Conclusion
The Chocolate Mirror Glaze Cake presents an exquisite finish to any dessert, elevating it for special occasions and celebrations. The glossy, reflective surface not only enhances the visual appeal but also adds a rich, chocolatey flavor that delights any chocolate lover. With the right technique and a few quality ingredients, you can create a stunning cake that is sure to impress your guests and bring joy to any gathering.
Chocolate Raspberry Mirror Glaze Cake
Combine the decadent chocolate cake with a layer of fresh raspberry filling before applying the chocolate mirror glaze for a delightful tartness.
Coconut Chocolate Mirror Glaze Cake
Incorporate a coconut cream layer in your cake for a tropical twist, and top it with a chocolate mirror glaze for a beautiful contrast.
Matcha Chocolate Mirror Glaze Cake
Layer matcha-flavored sponge cake with chocolate ganache for a unique blend of flavors, topped with the glossy chocolate mirror glaze.
Hazelnut Chocolate Mirror Glaze Cake
Add a hazelnut cream filling to your cake and finish with a chocolate mirror glaze for a rich nutty flavor that complements the chocolate.
Mint Chocolate Mirror Glaze Cake
Infuse your cake with fresh mint or mint extract, and cover it with the chocolate mirror glaze for a refreshing minty twist.
Spiced Chocolate Mirror Glaze Cake
Incorporate warm spices like cinnamon or cardamom into the cake batter and top with a classic chocolate mirror glaze for a cozy flavor profile.
Caramel Chocolate Mirror Glaze Cake
Layer your cake with a smooth caramel filling beneath the chocolate mirror glaze for a delectable sweet and salty combination.

Leave a Reply