
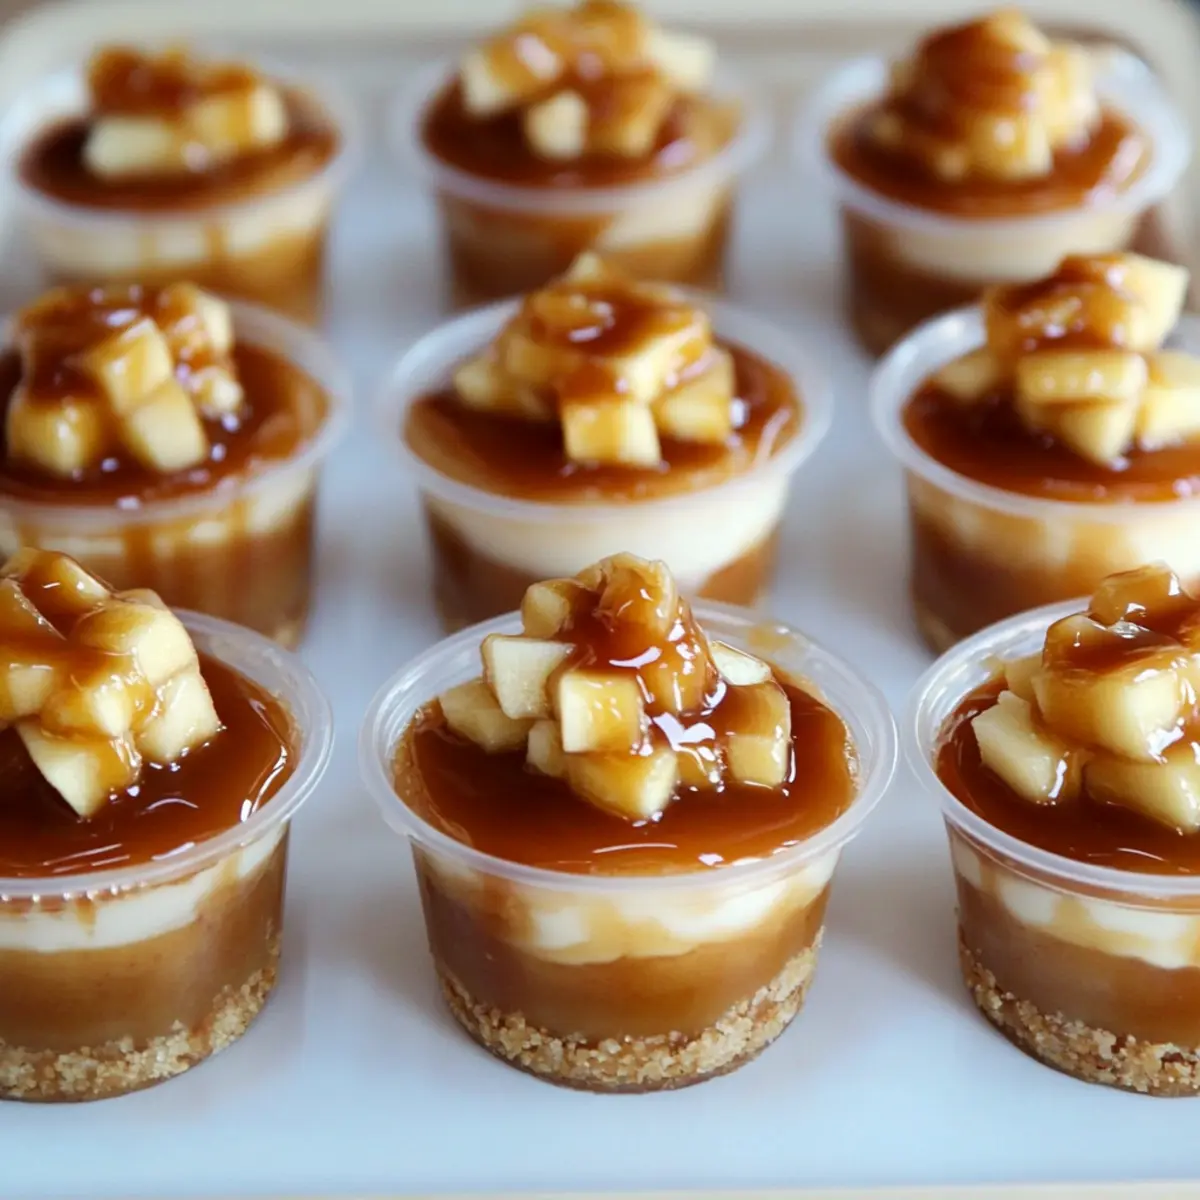
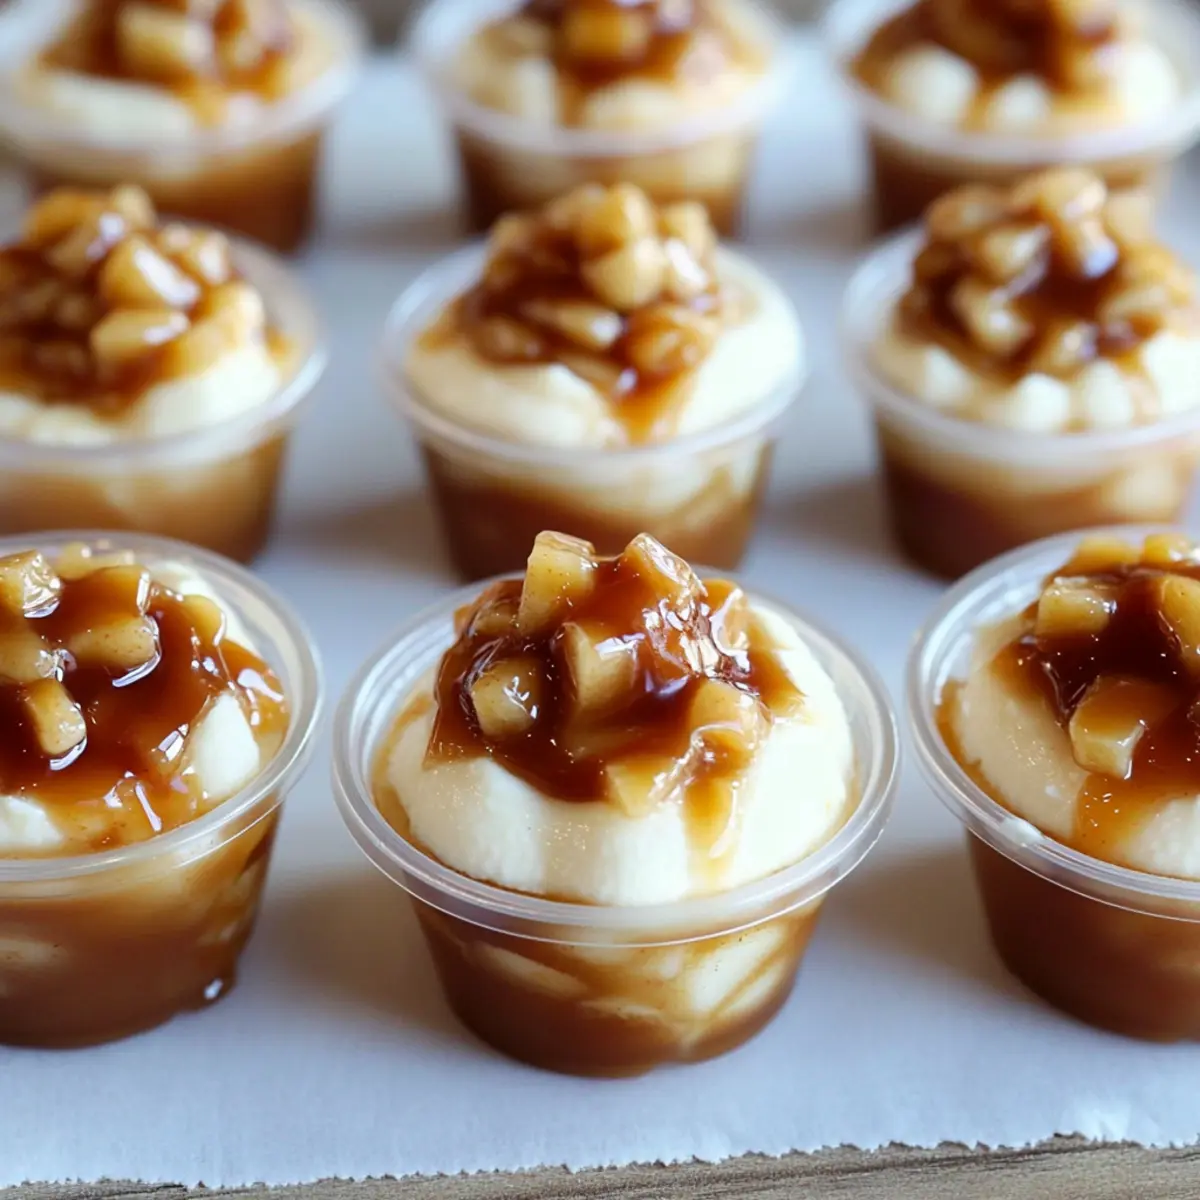
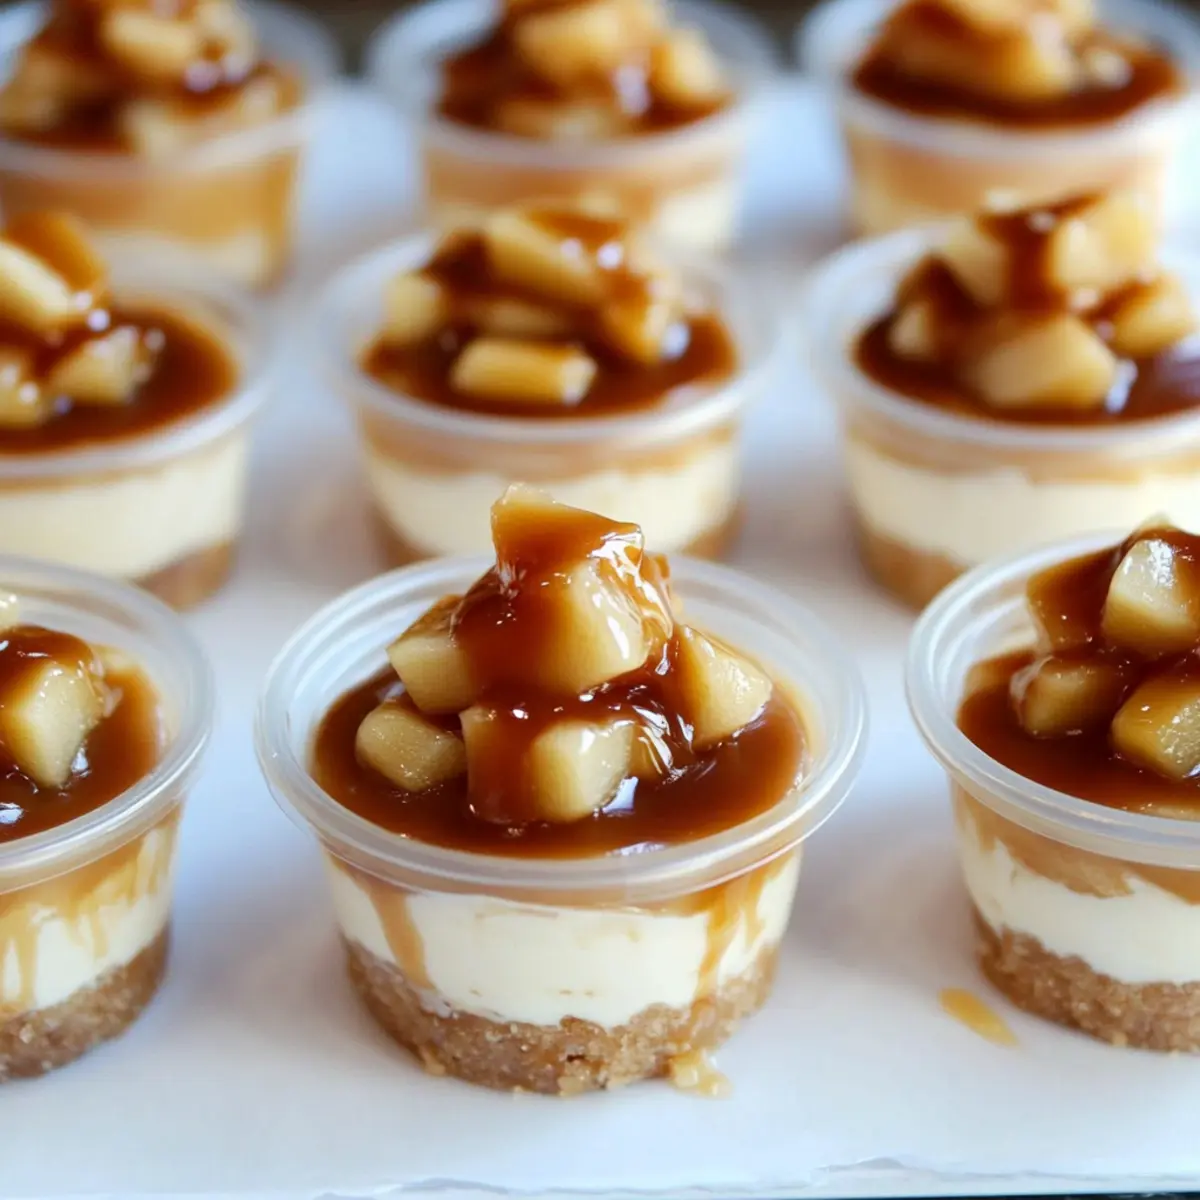
There's something utterly comforting about the fragrance of spiced apples mingling with warm caramel — a perfect reminder that cozy seasons are just around the corner. These No-Bake Caramel Apple Dessert Cups are a delightful treat that captures the essence of autumn in every bite. Imagine creamy salted caramel mousse layered with tender, cinnamon-infused apples and sitting atop a buttery vanilla wafer crust. Best of all, this dessert is completely portable, making it the ideal choice for potlucks or those spur-of-the-moment gatherings you find yourself hosting.
When I first made these cups, I was blown away by how quickly they came together without the need for an oven. They’re customizable too; whether you prefer tart Granny Smith apples or the sweetness of Honeycrisp, you can tailor the flavor to your liking. So gather your friends and family, because these easy-to-make dessert cups are bound to be the star of any meal, turning even the simplest gatherings into a sweet celebration!
Why are Caramel Apple Dessert Cups a Must-Try?
Simplicity at its finest: These no-bake dessert cups require minimal prep and no oven time, perfect for busy schedules.
Flavor explosion: The combination of creamy salted caramel, spiced cinnamon apples, and a crunchy crust creates a delightful contrast in every bite.
Customizable: You can switch up the apples or pudding flavors, making them a fresh treat each time you make them.
Portable: Great for potlucks or gatherings, these dessert cups are easy to transport and serve—no fuss involved!
Crowd-pleaser: With rich flavors and a stunning presentation, they’re sure to impress guests of all ages at any occasion.
Caramel Apple Dessert Cups Ingredients
-
For the Cinnamon Apples
Apples – Use tart varieties like Granny Smith for a perfect balance of sweetness and tang.
Brown Sugar – Adds richness and enhances the natural sweetness of the apples.
Ground Cinnamon – Gives that warm, cozy flavor we associate with fall desserts. -
For the Crust
Vanilla Wafer Crumbs – Provides a deliciously sweet and crunchy base; consider using graham cracker crumbs for a twist.
Salted or Unsalted Butter – Helps bind the crust together and enriches the overall flavor; make sure it's melted for easy mixing. -
For the Mousse
Instant Vanilla Pudding Mix – Creates a creamy mousse texture; avoid cooked pudding as it may alter the consistency.
Milk – Hydrates the pudding mix; any type of milk works, dairy or non-dairy!
Heavy Cream – Whipped to create a light and airy mousse; make sure it's cold for optimal results.
Salted Caramel Sauce – Infuses the mousse with yummy caramel goodness; feel free to use homemade or store-bought. -
For the Garnish
Additional Caramel Sauce – Drizzle on top for extra sweetness and a stunning visual appeal; it’s optional but highly recommended!
How to Make Caramel Apple Dessert Cups
-
Prepare Cinnamon Apples: In a saucepan, combine peeled and chopped apples with brown sugar and ground cinnamon. Cook over medium heat until the apples soften and the liquid thickens, then set aside to cool.
-
Make Crust: In a bowl, mix the vanilla wafer crumbs and melted butter until fully combined. Distribute the mixture into 28 plastic cups, pressing down firmly to create a solid crust.
-
Prepare Mousse: Whisk together the instant vanilla pudding mix and milk in a separate bowl, then chill for 5 minutes. Stir in the salted caramel sauce, and whip in the heavy cream with an electric mixer until thick and creamy—this should take about 3-5 minutes.
-
Assemble Cups: Pipe or spoon the mousse onto the crust layer, then add a generous layer of cooled cinnamon apples, finishing with a drizzle of the extra caramel sauce on top.
-
Chill & Serve: Cover the dessert cups and chill until you're ready to serve them. They can be made right before serving or stored in the refrigerator for 2-3 days.
Optional: Top with chopped nuts or a sprinkle of sea salt for added texture and flavor.
Exact quantities are listed in the recipe card below.
Caramel Apple Dessert Cups Variations
Feel free to get creative with these delicious dessert cups; they’re just as fun to customize as they are to enjoy!
-
Different Apples: Try using Honeycrisp or Fuji apples for added sweetness. Each apple variety offers a new flavor profile, making your dessert unique every time.
-
Alternate Pudding: Swap out the vanilla pudding for caramel or cheesecake pudding to introduce different creamy tastes. This simple change can lead to an entirely new dessert experience!
-
Dairy-Free Delight: Use coconut or almond milk in place of regular milk and a non-dairy whipped topping for a dairy-free version. You'll still enjoy a luxurious and creamy mousse!
-
Spice It Up: Add a pinch of nutmeg or ginger to the cinnamon apples for an unexpected spice kick. These warming spices will elevate the flavors, especially during autumn.
-
Nutty Crunch: Sprinkle chopped nuts like pecans or walnuts on top before serving. Not only does this add crunch, but it also deepens the flavor profile, making each bite even more satisfying.
-
Chocolate Drizzle: For a decadent twist, drizzle some melted chocolate over the caramel sauce. The rich chocolate pairs beautifully with the sweet caramel and tart apples.
-
Frozen Treat: Freeze the assembled cups for a refreshing summer dessert. Allow them to thaw slightly before serving for a delightful chilled treat on hot days.
-
Extra Caramel: Layer in more salted caramel sauce with the apples for a sweeter, gooey experience. It’s especially fun for those who can’t get enough of that caramel goodness!
How to Store and Freeze Caramel Apple Dessert Cups
Fridge: Store the dessert cups in an airtight container in the refrigerator for up to 3 days. Making them a day in advance enhances their flavor as they meld together.
Freezer: If you want to enjoy these cups later, freeze the assembled dessert cups without the apples and extra caramel. They can keep for up to 2 months and should be thawed in the fridge overnight before serving.
Reheating: While these caramel apple dessert cups are best served chilled, you can gently warm the apple layer in the microwave for a few seconds if desired. Avoid reheating the mousse to keep its creamy texture.
Serving Tip: If you plan to serve these at a gathering, prepare them in advance and chill; they’re not only delicious but visually appealing, making them a perfect treat for any occasion!
Expert Tips for Caramel Apple Dessert Cups
-
Choose Crisp Apples: Use only firm varieties like Granny Smith to avoid a mushy topping; their tartness balances the sweetness beautifully.
-
Melted Butter Only: Ensure your butter is melted for the crust mixture to combine well; cold butter can lead to a crumbly, uneven base.
-
Don’t Overmix Mousse: Whip the heavy cream until thick but be careful not to overdo it; overly whipped cream can turn grainy and lose airiness.
-
Assembly Matters: Layering is key—start with the mousse, then apples, and finish with caramel for a pretty presentation and balanced flavors.
-
Avoid Room Temperature: Keep the dessert cups chilled until serving; they taste best cold, and it helps maintain the mousse's texture and freshness.
-
Portion Control: For larger gatherings, consider making these caramel apple dessert cups in different cup sizes, adjusting the quantities accordingly to ensure everyone has a taste!
Make Ahead Options
These Caramel Apple Dessert Cups are perfect for meal prep enthusiasts! You can prepare the cinnamon apples and the crust up to 24 hours in advance to save valuable time. Simply cook the apples as directed, let them cool completely, and store them in an airtight container in the refrigerator. Mix the vanilla wafer crumbs and melted butter for the crust, and refrigerate it within the cups until you’re ready to assemble. On the day of serving, whip together the mousse with the pudding mix, milk, and the caramel sauce, then pipe it over the crusts and layer with the chilled apples. This method ensures that your dessert stays just as delicious while allowing the flavors to meld beautifully.
What to Serve with Caramel Apple Dessert Cups?
Dive into a memorable dining experience by pairing these delightful dessert cups with equally delicious accompaniments that elevate your meal.
-
Spiced Cider: The warm, aromatic flavors of spiced cider complement the sweetness of the caramel perfectly, making it an ideal fall beverage.
-
Savory Cheese Platter: A mix of sharp cheddar and creamy brie cuts through the sweetness, creating a stunning contrast that keeps taste buds intrigued.
-
Whipped Cream: A dollop of freshly whipped cream adds an airy texture that beautifully balances the rich mousse and caramel flavors. It’s a classic pairing!
-
Chocolate Drizzle: Enhance your dessert visually and flavor-wise by drizzling chocolate sauce atop the caramel; the bitterness of dark chocolate plays wonderfully against the sweetness.
-
Cinnamon Sugared Nuts: Crunchy nuts coated in cinnamon sugar bring an extra layer of texture while harmonizing with the apples’ spiced flavor profile.
-
Coffee: Serve a robust cup of coffee alongside these dessert cups to provide a warm finish to rich sweetness; it's the perfect companion to elevate your meal experience.
-
Pumpkin Spice Muffins: Soft, spice-laden muffins offer hearty satisfaction and a delightful contrast with the lighter dessert cups, creating a well-rounded spread.
Let each bite of your dessert cup be complemented by these delightful pairings, turning any meal into a sweet celebration!
Caramel Apple Dessert Cups Recipe FAQs
What type of apples should I use for the cinnamon apples?
Absolutely! For the best flavor and texture, use tart varieties like Granny Smith, Pink Lady, or Crispin. These apples hold up well during cooking and offer a delightful contrast to the sweet caramel mousse.
How should I store the Caramel Apple Dessert Cups?
You’ll want to store them in an airtight container in the refrigerator for up to 3 days. Making them a day in advance is a great idea as the flavors meld together beautifully. Just be sure to keep them covered to maintain freshness!
Can I freeze the Caramel Apple Dessert Cups?
Yes, you can! To freeze, assemble the dessert cups without the cinnamon apples and extra caramel on top. Freeze them for up to 2 months. When you're ready to enjoy, just thaw them in the refrigerator overnight.
What if my mousse doesn’t thicken properly?
Very! If your mousse hasn't thickened after whipping for 3-5 minutes, try giving it a few more seconds while also making sure your heavy cream is cold. You can also aerate the pudding mix by whisking it much faster, which can help incorporate more air and achieve the right consistency.
Are there any dietary considerations for these dessert cups?
Definitely! To make them gluten-free, ensure you’re using gluten-free vanilla wafers or graham cracker crumbs. Moreover, for dairy-free options, substitute the heavy cream with coconut cream and use non-dairy milk for the pudding. Always check labels for any additional allergens to ensure a safe treat for everyone!
How can I customize the Caramel Apple Dessert Cups?
The more the merrier! You can switch up the toppings by using different apple varieties, or even try caramelized bananas for a fruity twist. Additionally, consider experimenting with pudding flavors, such as cheesecake or chocolate, to create a unique dessert for any occasion.
Indulgent Caramel Apple Dessert Cups for Effortless Sweetness
Equipment
- saucepan
- mixing bowl
- electric mixer
- Plastic Cups
Ingredients
For the Cinnamon Apples
- 4 cups Apples Use tart varieties like Granny Smith.
- ½ cup Brown Sugar Enhances sweetness.
- 1 teaspoon Ground Cinnamon Adds warm flavor.
For the Crust
- 2 cups Vanilla Wafer Crumbs Or graham cracker crumbs for a twist.
- ½ cup Salted or Unsalted Butter Melted.
For the Mousse
- 1 package Instant Vanilla Pudding Mix Avoid cooked pudding.
- 2 cups Milk Any type works.
- 1 cup Heavy Cream Whipped.
- 1 cup Salted Caramel Sauce Homemade or store-bought.
For the Garnish
- ¼ cup Additional Caramel Sauce Optional for drizzle.
Instructions
Preparation Steps
- Prepare Cinnamon Apples: In a saucepan, combine peeled and chopped apples with brown sugar and ground cinnamon. Cook over medium heat until the apples soften and the liquid thickens, then set aside to cool.
- Make Crust: In a bowl, mix the vanilla wafer crumbs and melted butter until fully combined. Distribute the mixture into 28 plastic cups, pressing down firmly to create a solid crust.
- Prepare Mousse: Whisk together the instant vanilla pudding mix and milk in a separate bowl, then chill for 5 minutes. Stir in the salted caramel sauce, and whip in the heavy cream with an electric mixer until thick and creamy—this should take about 3-5 minutes.
- Assemble Cups: Pipe or spoon the mousse onto the crust layer, then add a generous layer of cooled cinnamon apples, finishing with a drizzle of the extra caramel sauce on top.
- Chill & Serve: Cover the dessert cups and chill until you're ready to serve them. They can be made right before serving or stored in the refrigerator for 2-3 days.


Leave a Reply