Introduction
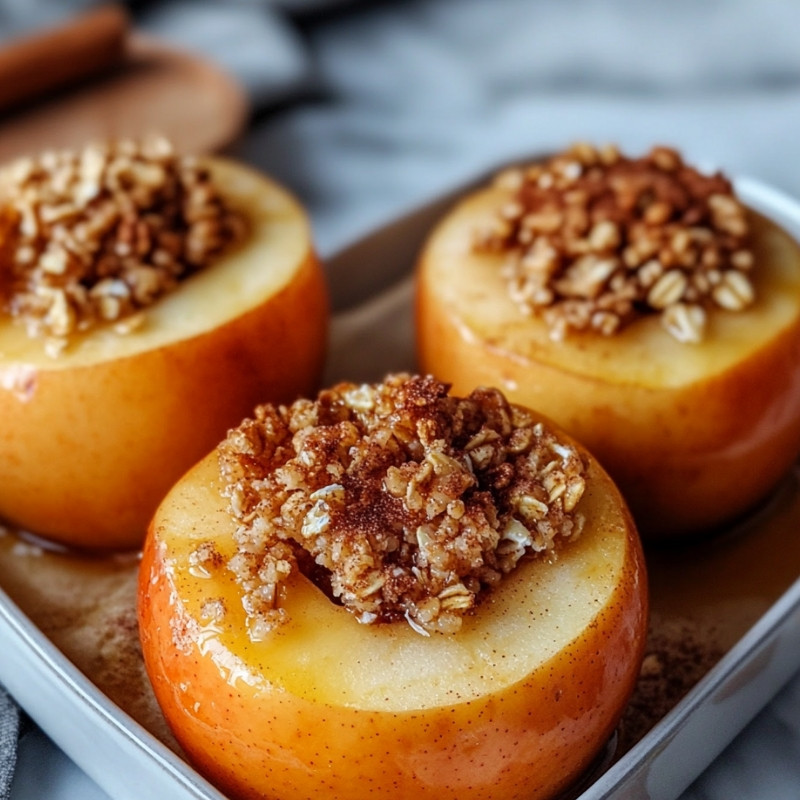
Baked apples are a delightful treat that brings warmth to any occasion. With their sweet, tender flesh and a filling of spiced oats and nuts, this cozy dessert is perfect for family gatherings, fall festivities, or simply enjoying at home. The combination of flavors and textures makes baked apples an irresistible choice for dessert lovers, offering both comfort and a touch of adventure to your palate.
Ingredients
4 large apples (about 800g)
50g rolled oats
40g chopped walnuts
50g brown sugar
1 teaspoon cinnamon
¼ teaspoon nutmeg
30g unsalted butter, melted
½ teaspoon vanilla extract
100ml apple juice or water
20g raisins (optional)
Prep Time
10 mins
Cook Time, Total Time, Yield
Cook Time: 40 mins
Total Time: 50 mins
Yield: 4 servings
Directions
1. Preheat the oven to 180°C (350°F).
2. Core the apples, ensuring you don’t cut through the bottom, creating a well for the filling.
3. In a bowl, mix oats, walnuts, brown sugar, cinnamon, nutmeg, melted butter, vanilla extract, and raisins if using.
4. Stuff the mixture into the apples, pressing it down gently.
5. Place the apples in a baking dish and pour the apple juice or water into the bottom.
6. Cover with foil and bake for 20 minutes.
7. Remove the foil and bake uncovered for another 15-20 minutes until the apples are tender.
8. Serve warm, optionally with vanilla ice cream or yogurt.
Enjoy this simple yet satisfying dessert that evokes memories of cozy kitchens and warm family gatherings. Baked apples are sure to become a cherished recipe in your home!
Detailed Directions and Instructions
1. Preheat the Oven
Preheat the oven to 180°C (350°F).
2. Prepare the Apples
Core the apples, making sure not to cut through the bottom. This will create a well for the filling.
3. Mix the Filling
In a bowl, combine the rolled oats, chopped walnuts, brown sugar, cinnamon, nutmeg, melted butter, and vanilla extract. Add raisins if desired.
4. Stuff the Apples
Gently press the oat and nut mixture into the prepared apples, filling them generously.
5. Arrange in Baking Dish
Place the stuffed apples in a baking dish. Pour the apple juice or water into the bottom of the dish to keep the apples moist during baking.
6. Cover and Bake
Cover the baking dish with aluminum foil and bake for 20 minutes.
7. Finish Baking Uncovered
After 20 minutes, remove the foil and continue baking for an additional 15-20 minutes, or until the apples are tender and golden.
8. Serve
Remove the apples from the oven and serve warm. Pair with vanilla ice cream or yogurt for an extra treat if desired.
Notes
Serving Suggestions
These baked apples pair well with a scoop of vanilla ice cream or a dollop of yogurt for added creaminess.
Storage Tips
Leftover baked apples can be stored in an airtight container in the refrigerator for up to 3 days.
Apple Variety
Choose apples that are firm and hold their shape well when baked. Varieties like Granny Smith, Honeycrisp, or Fuji work great.
Customization Options
Feel free to customize the filling by adding different nuts, seeds, or spices according to your preference.
Storage Instructions
Cooling
Allow the baked apples to cool to room temperature before storing.
Refrigeration
Store any leftovers in an airtight container in the refrigerator. They can be kept for up to 3 days.
Reheating
To reheat, place the apples in an oven at 180°C (350°F) for 10-15 minutes, or microwave for about 1-2 minutes until warmed through.
Serving Suggestions
A la Mode
Serve warm baked apples with a scoop of vanilla ice cream or whipped cream for a delightful contrast in temperature and flavor.
Yogurt Pairing
For a lighter option, top the baked apples with a dollop of Greek yogurt and a sprinkle of cinnamon.
Drizzle
Consider drizzling caramel sauce or honey over the baked apples just before serving for added sweetness.
Nutritional Information
Per Serving (1 Apple)
Calories: Approximately 220
Fat: 9g
Sodium: 5mg
Carbohydrates: 35g
Fiber: 4g
Sugars: 15g
Protein: 3g
Nutritional Highlights
Baked apples are a good source of dietary fiber, and the addition of walnuts offers healthy fats and protein, making this dessert both delicious and somewhat nutritious.
Ingredient Substitutions
Apples
Any variety of apple can be used. Granny Smith or Honeycrisp are great alternatives that provide a nice balance of tartness and sweetness.
Nuts
If you're allergic to walnuts, you can substitute with chopped almonds, pecans, or sunflower seeds for additional crunch.
Sweeteners
For a lower sugar option, consider using honey or maple syrup instead of brown sugar, adjusting the amount according to taste.
Oats
If you require a gluten-free option, substitute rolled oats with gluten-free oats or crushed gluten-free granola.
Butter
To make this recipe dairy-free, use coconut oil or a dairy-free butter substitute in place of unsalted butter.
Cook techniques
Preparing the Apples
Core the apples carefully to create a hollow center while ensuring the bottom remains intact for holding the filling.
Mixing the Filling
Combine rolled oats, chopped walnuts, brown sugar, cinnamon, nutmeg, melted butter, and vanilla in a bowl. Optionally, add raisins for extra sweetness and texture.
Stuffing the Apples
Gently fill each cored apple with the oat and nut mixture, pressing it down lightly to pack it in.
Baking the Apples
Place the stuffed apples in a baking dish and pour apple juice or water into the bottom. Cover with foil initially to steam the apples, then uncover to allow browning.
Checking for Doneness
The apples are done when they are tender and easily pierced with a fork, typically after a total baking time of 35-40 minutes.
FAQ
Can I use different types of apples for this recipe?
Yes, you can use any variety of apples suitable for baking, such as Honeycrisp, Granny Smith, or Fuji.
Is it possible to make this recipe vegan?
Yes, you can substitute the unsalted butter with a plant-based butter or coconut oil and omit the optional raisins if desired.
How do I store leftover baked apples?
Leftover baked apples can be stored in an airtight container in the refrigerator for up to 3 days.
Can I freeze baked apples?
Yes, you can freeze baked apples. Allow them to cool completely before placing them in a freezer-safe container. They can be stored for up to 3 months.
What can I serve with baked apples?
Baked apples are delicious on their own or served warm with vanilla ice cream, whipped cream, or yogurt for added richness.
Conclusion
Baked apples are a delightful treat that combines the natural sweetness of fruit with a warm, comforting filling. This simple yet elegant dessert is perfect for any occasion, and it is sure to please both family and friends. The warm spices and nutty texture create a harmonious balance that is both satisfying and indulgent. Enjoy them fresh out of the oven or with a scoop of vanilla ice cream for an extra special touch.
Apple and Cranberry Delight
Combine dried cranberries with the oat and nut mixture for a tart twist that complements the sweetness of the apples beautifully.
Pecan Pie Baked Apples
Substitute walnuts with pecans and add a touch of maple syrup for a rich, pecan pie-inspired filling.
Chocolate Chip Baked Apples
Mix in chocolate chips with the filling to satisfy your sweet tooth and create a decadent dessert.
Coconut Almond Baked Apples
Add shredded coconut and sliced almonds to the oat mixture for a tropical flavor that pairs wonderfully with the apples.
Spiced Pear and Apple Bake
Incorporate sliced pears along with apples for a fragrant blend of flavors that enhance the baked fruit experience.
Nut Butter Stuffed Baked Apples
Fill the apples with your favorite nut butter and a sprinkle of granola for a protein-packed dessert that's still indulgent.


Leave a Reply