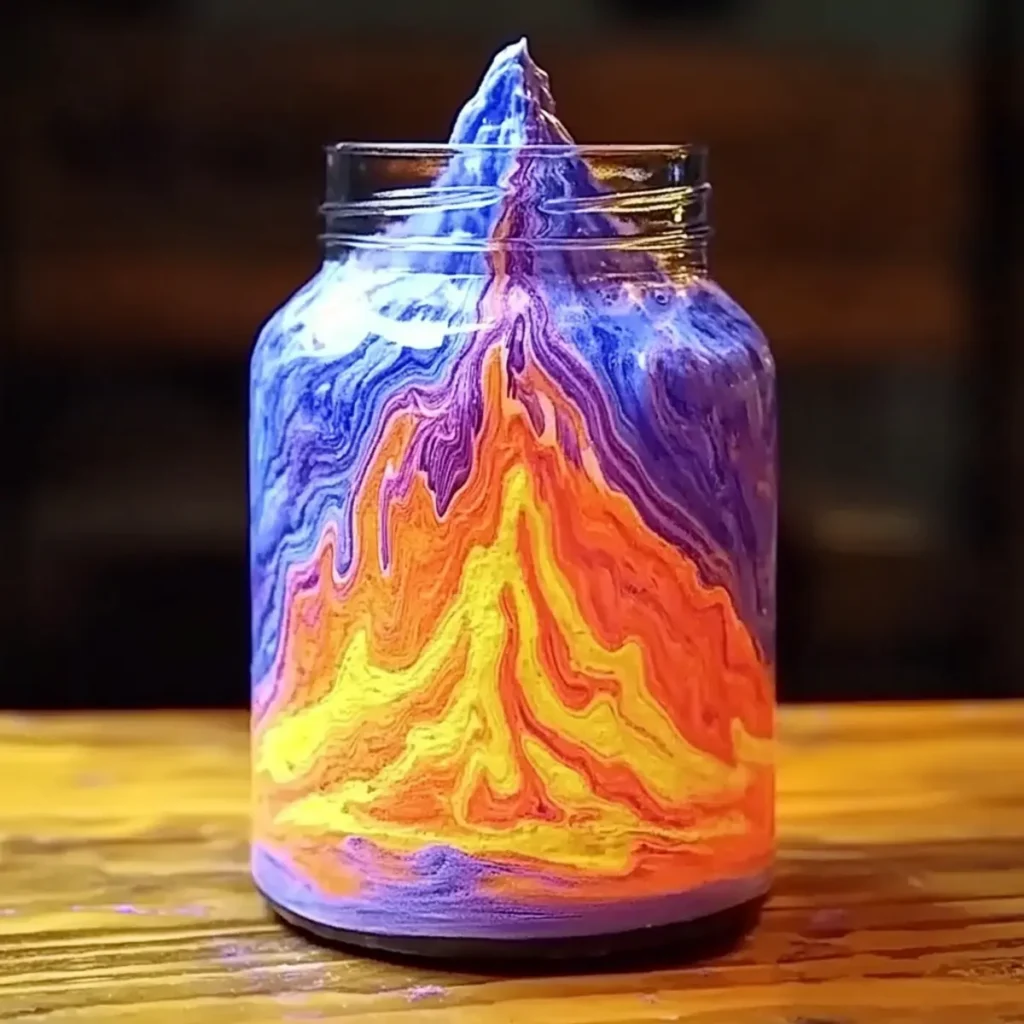
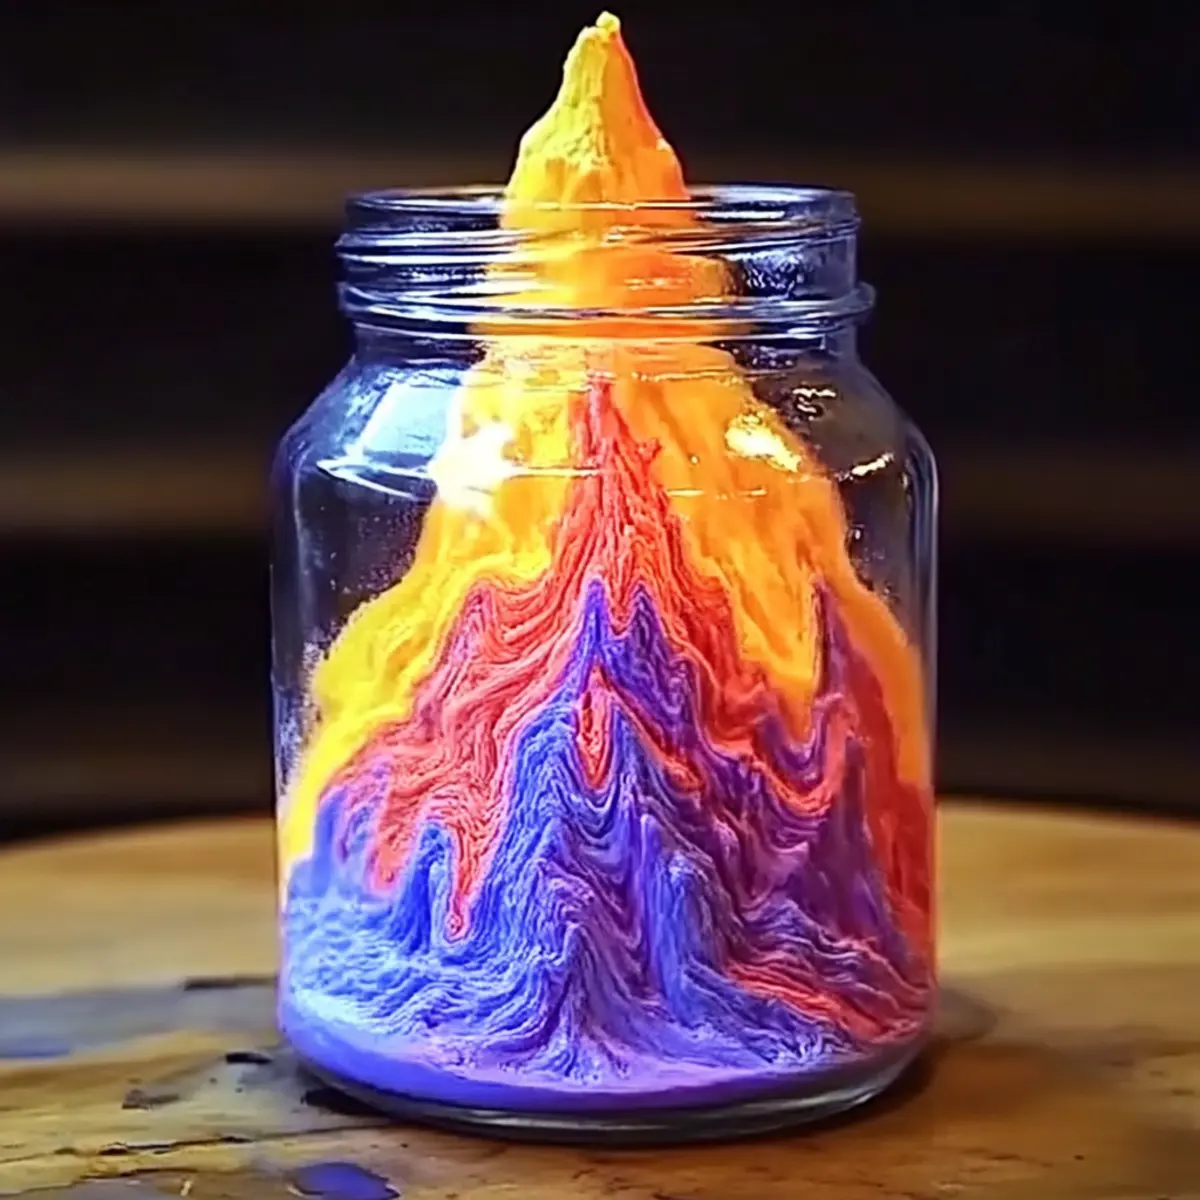
There’s nothing quite like the thrill of bringing science to life in the comfort of your own kitchen! I discovered the captivating DIY Erupting Volcano Experiment on a rainy afternoon when my kids were itching for something fun to do. In just 6 minutes, we created a colorful, fizzy spectacle that had them giggling with delight as the “lava” flowed and bubbled out of its crater. This hands-on activity not only ignites curiosity about basic chemistry but also transforms learning into a joyful experience.
Perfect for children’s parties, homeschooling, or a cheerful weekend project, this engaging experiment is sure to captivate young minds. Plus, with ingredients you probably already have at home, it’s an easy and exciting way to break free from the mundane. So, gather your little scientists and get ready to embark on a playful journey into the world of eruptions – your DIY adventure awaits!
Why is this DIY Volcano Eruption Experiment for Kids so exciting?
Interactive Learning: This DIY Volcano Eruption Experiment for Kids transforms education into an engaging activity that kids will love.
Quick Setup: In just 6 minutes, you'll jump from gathering ingredients to an exciting eruption, perfect for busy parents!
Creative Freedom: Personalize the eruption with different food coloring for vibrant lava effects.
Endless Fun: Reuse the setup for multiple eruptions, encouraging repeated exploration of science.
Perfect for All Occasions: Whether for a playdate, party, or homeschooling, this experiment fits seamlessly into any event.
Smile-Inducing Delight: The joy on your kids' faces as they watch the colorful eruption unfold will make this a memorable experience!
DIY Volcano Eruption Experiment Ingredients
Gather what you need for a fun eruption!
- Small jar or clear plastic bottle – Holds the eruption, ensuring a safe and contained experience.
- Baking soda (2 tablespoons) – This ingredient reacts with vinegar to produce the exciting eruption you desire.
- Vinegar (¼ cup) – The key ingredient that creates the fizz and explosive action for the DIY volcano.
- Water (1 tablespoon) – Helps mix with vinegar for a better reaction and enhances the bubbling effect.
- Dish soap (1 tablespoon) – Optional, but enhances foam and the overall quality of the eruption.
- Food coloring (to taste) – Optional, adds a vibrant splash of color to your “lava” for a more exciting visual.
- Small funnel – Optional, aids in pouring ingredients without spills, making clean-up easier.
- Tray or large dish – Essential for catching spills during the eruption, keeping your area tidy.
- Spoon – For scooping and pouring the ingredients if you choose to skip the funnel.
Prepare for an explosive and educational experience with this DIY Volcano Eruption Experiment for Kids that guarantees colorful fun!
How to Make the DIY Volcano Eruption Experiment for Kids
-
Gather Ingredients: Start by collecting all your ingredients and materials on a flat surface. This will ensure a smooth and enjoyable eruption experience for everyone involved.
-
Set Up: Place the small jar or clear plastic bottle on a tray or large dish. This will catch any spills during the eruption, keeping your space tidy, so you can focus on the fun!
-
Add Baking Soda: Spoon in 2 tablespoons of baking soda into your jar. This will be your volcanic base, ready to react with the vinegar for an exciting explosion.
-
Mix Vinegar Solution: In a separate cup, combine ¼ cup of vinegar, 1 tablespoon of water, and food coloring (if desired). This colorful mixture will create a fantastic fizz when poured over the baking soda!
-
Initiate the Eruption: Pour the vinegar mixture into the jar with baking soda all at once. Stand back and watch in awe as the bubbling reaction creates a vibrant eruption!
-
Enjoy the Show: Observe as the mixture bubbles and erupts, resembling lava flowing out of a volcano. This colorful and fizzy display will mesmerize kids and adults alike.
-
Repeat the Fun: For multiple eruptions, rinse the jar and reload it with fresh ingredients. This way, the fun can keep going, and curiosity can be explored time and time again!
Optional: Add extra dish soap for an even more impressive foam eruption!
Exact quantities are listed in the recipe card below.

DIY Volcano Eruption Experiment for Kids Variations
Feel free to tailor your volcano adventure with these exciting twists!
-
Colorful Lava: Use different food coloring to create uniquely vibrant eruptions, letting kids choose their favorite colors for extra fun.
-
Scented Eruption: Substitute apple cider vinegar for white vinegar for a fruity fragrance that adds an unexpected twist to the experience.
-
Bubbly Boost: Add a tablespoon of baking soda to the vinegar mixture for a more explosive eruption that takes the show up a notch!
-
Texture Explosion: Incorporate a few drops of dish soap in the baking soda; it creates thicker, foamier “lava” that makes for a spectacular display.
-
Layered Lava: Create layers in your jar using colored baking soda before adding the vinegar mix. Each layer will change how the eruption looks uniquely!
-
Edible Experiment: If the kids want to eat afterward, swap the baking soda and vinegar for gelatin and soda, creating a colorful, edible "lava" treat!
-
Scale Up: Use a larger container for a grander eruption; a bigger volcano means more room for creative color choices and action!
-
Themed Decorations: Have kids create mini volcanoes using clay or playdough around the jar for added creativity before the eruption even starts.
Let your imagination flow with these variations, ensuring every eruption is a unique and memorable experience!
Expert Tips for the Best DIY Volcano Eruption Experiment
-
Dish Soap Delight: Add extra dish soap for an impressive foam eruption that enhances the visual appeal of your DIY volcano eruption experiment for kids.
-
Pour Gradually: For a slower, more controlled eruption, pour the vinegar slowly instead of all at once to create a mesmerizing flow of “lava.”
-
Rinse and Reload: After each eruption, wash your jar before loading it again to ensure the reaction stays vibrant and strong for repeated bursts of excitement.
-
Color Combination: Experiment with different food coloring combinations; mixing colors can create unique lava effects that keep the experience fresh and engaging.
-
Setup Safety: Always conduct the experiment in a space where it’s okay to make a mess; this ensures everyone can enjoy the fun without worrying about cleanup!
Make Ahead Options
The DIY Volcano Eruption Experiment for Kids is perfect for busy parents looking to save time while ensuring educational play! You can prepare the baking soda in the jar up to 24 hours in advance—just add 2 tablespoons of baking soda and cover it tightly. Mix the vinegar solution (¼ cup vinegar, 1 tablespoon of water, and any food coloring) and store it in a sealed container in the refrigerator for up to 3 days. When you’re ready to create the eruption, simply pour the vinegar mixture over the baking soda and stand back to enjoy the colorful explosion! This prep-ahead strategy helps maintain quality and ensures a fun, distraction-free experiment on busy days.
What to Serve with DIY Erupting Volcano?
Dive into a world of educational fun that's perfect for family gatherings or adventurous playdates!
- Colorful Cupcakes: These sweet treats add a fun, festive touch and can be decorated like mini volcanoes for extra excitement.
- Fruit Punch: A bubbly, fruity drink pairs perfectly to quench thirst after all that active experimentation, keeping everyone refreshed.
- Veggie Sticks with Dip: Encourage healthy snacking with crunchy veggies and a tasty dip, providing a crisp texture to balance the sweet treats.
- Pizza Bites: These are a crowd favorite and provide filling sustenance to fuel those little scientists during their eruption excitement.
- Ice Cream Sundaes: Let each child create their own sundae volcano using scoops of ice cream topped with colorful sauces, continuing the volcano theme deliciously.
- Science-Themed Party Favors: Consider giving small kits for mini experiments as take-home goodies to continue the learning fun.
- Gummy Volcanoes: Fun treats that reflect the theme perfectly, allowing kids to enjoy a sweet taste of science after their hands-on eruption experience.
Let these delightful additions complement your DIY Volcano Eruption Experiment, enhancing the fun and making memories to last a lifetime!
How to Store and Freeze DIY Volcano Eruption Experiment for Kids
Leftover Ingredients: Keep any unused ingredients like baking soda, vinegar, and dish soap in a cool, dry place, ideally in their original containers, for up to 6 months.
Prepared Eruptions: Since the eruption mixture is best used fresh, it's recommended to prepare it just before use. However, you can store any leftover mixture in an airtight container in the refrigerator for up to 2 days.
Tools & Materials: Clean and dry the small jar or bottle after each use. Store it with your other kitchen supplies, ready for your next DIY volcano adventure!
Safety Reminder: Always supervise children during this activity, ensuring a safe and enjoyable experience. The fun of a DIY volcano eruption experiment for kids should be repeated safely!

DIY Volcano Eruption Experiment for Kids Recipe FAQs
What kind of jar or bottle should I use for the volcano?
I recommend using a small jar or clear plastic bottle. This way, you can easily see the colorful eruption inside, and the container should be sturdy enough to hold the baking soda and vinegar reaction without tipping over.
How long can I store the ingredients for my DIY Volcano Eruption?
You can store any unused ingredients, like baking soda and vinegar, in a cool, dry place for up to 6 months. Just keep them in their original containers to maintain their effectiveness.
Can I freeze any part of this experiment?
Since the eruption mixture is intended for immediate use, I wouldn't recommend freezing it. However, you can prepare the baking soda and vinegar separately ahead of time. Just mix them fresh right before you're ready to see that fizzy reaction!
What if my eruption is not bubbly enough?
Absolutely! For a fizzier eruption, try adding extra dish soap to your vinegar solution. If it's still not bubbly, consider pouring the vinegar more quickly into the baking soda; this can increase the reaction and help create a more spectacular effect!
Is this experiment safe for pets?
While the ingredients are not toxic, I recommend keeping pets away during the experiment, especially if they are curious and love to investigate! You want to ensure a safe environment for everyone, including furry friends.
How can I make my eruption more colorful?
You can personalize your DIY volcano by experimenting with different food coloring combinations. Mixing colors can create unique lava-like effects! Have fun with it and see what vibrant combinations you can discover!
DIY Volcano Eruption Experiment for Kids - Colorful & Fun!
Equipment
- small jar or clear plastic bottle
- tray or large dish
- Spoon
- small funnel
Ingredients
Volcano Components
- 2 tablespoons baking soda
- ¼ cup vinegar
- 1 tablespoon water
- 1 tablespoon dish soap optional
- food coloring to taste, optional
Containers
- small jar or clear plastic bottle
- tray or large dish to catch spills
- spoon
- small funnel optional for easy pouring
Instructions
Experiment Steps
- Gather Ingredients: Start by collecting all your ingredients and materials on a flat surface.
- Set Up: Place the small jar or clear plastic bottle on a tray or large dish to catch spills.
- Add Baking Soda: Spoon in 2 tablespoons of baking soda into your jar.
- Mix Vinegar Solution: In a separate cup, combine ¼ cup of vinegar, 1 tablespoon of water, and food coloring (if desired).
- Initiate the Eruption: Pour the vinegar mixture into the jar with baking soda all at once.
- Enjoy the Show: Observe the mixture as it bubbles and erupts, resembling lava flowing out of a volcano.
- Repeat the Fun: Rinse the jar and reload it with fresh ingredients for multiple eruptions.

Leave a Reply